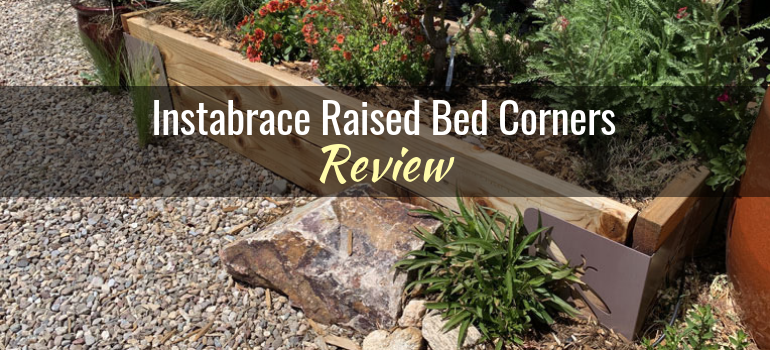
Instabrace Raised Bed Corners: Product Review
We independently evaluate all recommended products and services. If you click on links we provide, we may receive compensation.
Sturdy raised bed corners with two designs to choose from, but not as easy to use as expected.
Available on Amazon
Buy ItThe Bloom Instabrace raised bed corners from Bond Manufacturing promise to turn designing and building a raised bed into a quick, easy and tool-free task. In reality, it’s not quite that simple.
What’s the Instabrace?
There are two common reasons why people don’t purchase or set up raised beds:
- premade ones may not be the right size or style
- making sturdy, well-fitting corners for DIY raised beds can be difficult
The Instabrace solves both of these problems.
It consists of 4 powder-coated steel corners into which you simply slide any 2-inch thick wood boards of your choice. The corner pieces hold everything together and you can tailor the look and size of the raised bed to suit your yard and aesthetic preferences.
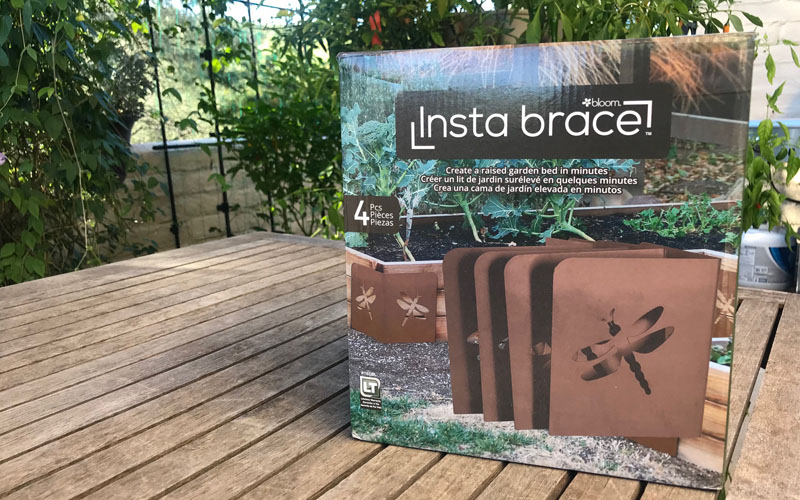
Four Instabrace corners are packaged in a cardboard box
Bond offers the Instabrace in two designs: a half sun and a dragonfly.
Assembling a Raised Bed Using the Instabrace
Based on the instructions – or rather, the lack of written instructions – I expected assembly to be a breeze. Especially when the manufacturer says “Leave the Toolbox in the Shed: No bolts, nails, or screws needed!”
Looking at the instructions, it seems that you simply place the four corners where you’d like the raised bed to be and drop 2-inch planks in place between the Instabrace corners.
Choosing Boards for the Raised Bed Sides
The corner braces are roughly 10 inches tall and 9 inches wide. The manufacturer recommends that the total height of the sides not exceed 12 inches and the packaging shows three options for stacking planks to do that:
- 1 x 12-inch wide plank
- 2 x 6-inch wide planks
- 3 x 4-inch wide planks
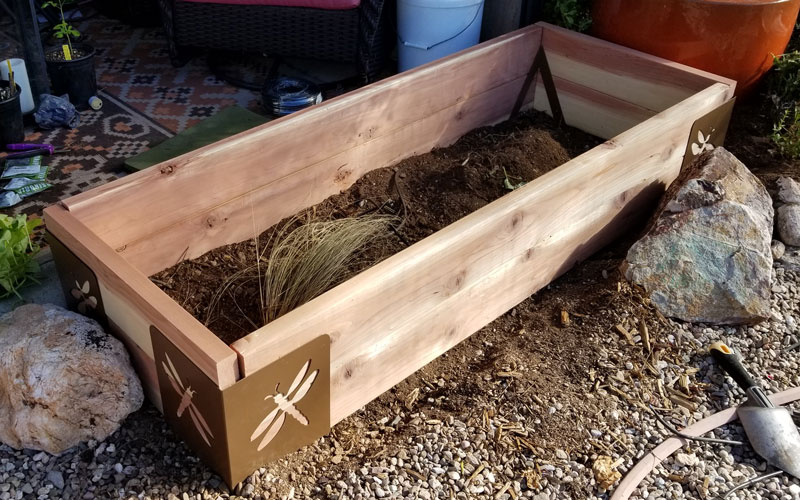
I chose to use two 6-inch redwood planks for each side (a cheaper option than buying 12-inch boards), purchased at our local big box hardware store. Given the height of the Instabrace, I was concerned that using 4-inch boards would make the top layer unstable as only 2 inches would be supported by the corner braces.
To make things easier, I had the planks cut to length at the store. You may have to pay a minimal fee per cut but it’s easier than doing it yourself and, depending on the length, you can even get the cut planks into your car (instead of having to strap them to the roof to get them home).
Naturally rot-resistant wood, such as cedar or redwood, is a good option for constructing raised beds. If you plan to grow edibles in the bed, avoid using pressure treated wood as it can leach chemicals that you may not want to ingest.
Raised beds can be built to almost any width and length, as well as in different configurations (for example, octagonal, cross-shaped). With the Instabrace, you’re limited to a square or rectangle.
Keep the width narrow enough that you can reach the center of the bed to plant, weed and/or harvest. Length shouldn’t exceed 10 feet or the sides will start to bow outward (unless you install additional supports along the sides but that defeats the purpose of using something like the Instabrace which is supposed to make the whole job easy and not require the use of any tools).
Four braces make up the Instabrace system.
Leveling the Raised Bed
The first problem I ran into was getting the ground totally level. If any of the four corners is at a different height, the whole bed will be tilted and the corners won’t fit together properly.
The ground between the corners must also be flat (or at least not have any high spots) or the planks won’t stack properly and, again, the corners won’t fit together.
The easiest place to set up a raised bed using the Instabrace is on a level surface, such as a concrete patio or garage floor. If you’d rather place it on soil, be prepared to spend a lot of time digging, raking, compacting and checking that the ground is totally level.
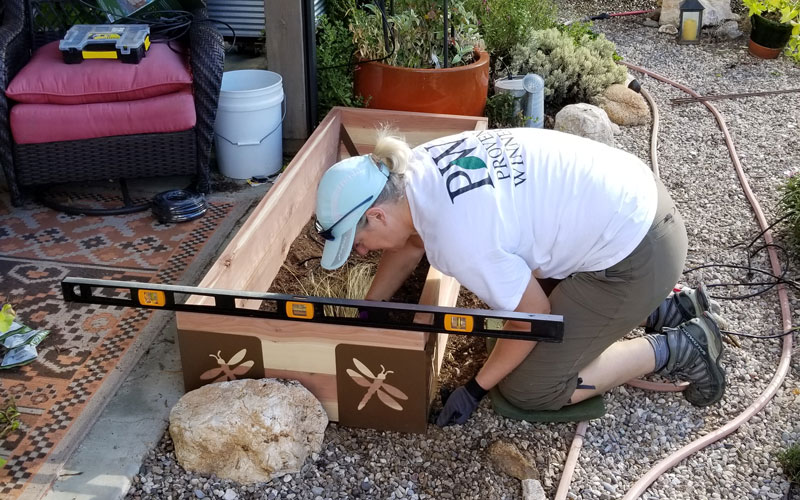
You’ll have to level the ground to get the planks and Instabrace bracket to fit together properly.
Unlike other raised bed corner options that securely fasten the boards to the corners, you cannot use the Instabrace corners to put the frame together on a flat surface and then carry it to its final location.
Once that’s done, set the four corners in place and start stacking planks.
Installing the Sides of the Bed
The corners will form butt joints, where the end of one plank butts up against the side of another. Be sure that you have the planks placed correctly so each side of the raised bed is the same length.
Although it seems simple, placing the boards into the Instabrace isn’t a one-person job!
As you stack the boards, the corners will move around unless they’re firmly held in place (by a person, stakes, rocks, etc.). No matter how hard I tried, I couldn’t get both rows of planks placed into the corner braces so that the joints were tight and the corners were square. Eventually, I gave up and brought in the muscle (aka the hubby) to help hold things together.
Filling the Raised Bed
When all of the planks are firmly in place, fill the bed with a soil mix that’s appropriate for your location and plants. I used a mixture of potting soil, perlite and compost that has done well for me in other raised beds.
As I filled the bed, I noticed that the corner braces started to move outward as soil pushed against the planks. The corner joints opened up and the entire bed ended up crooked. Drat. So out came the soil while I pondered my next move.
In the end, I used screws to attach the bottom layer of planks directly to the Instabrace corners. There’s a conveniently-placed hole in each brace that makes this easy, although there’s no mention of it in the instructions or on the website.
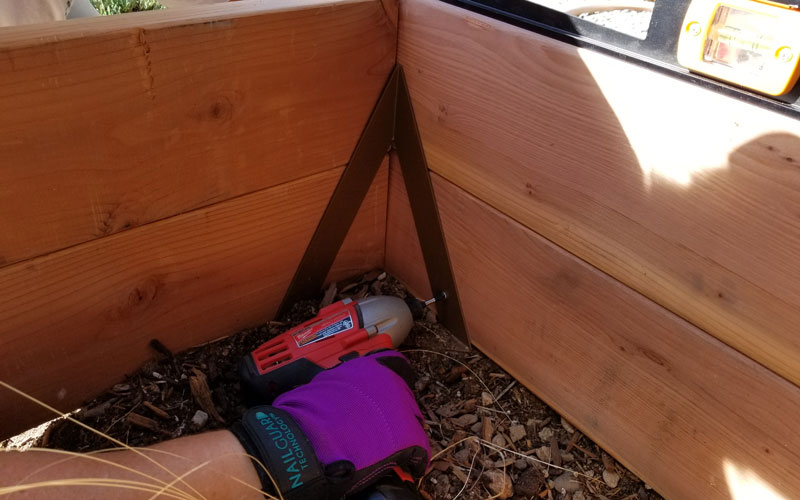
Screwing the bottom of the Instabrace to the planks that touched the ground made the system more secure.
Screwing the planks to the corner pieces held everything nicely in place but it did have a downside. When I filled the bed with soil, the bottom planks were held against the inside of the Instabrace while the top planks were pushed against the outside of it. As a result, there was a gap between the top planks at each corner.
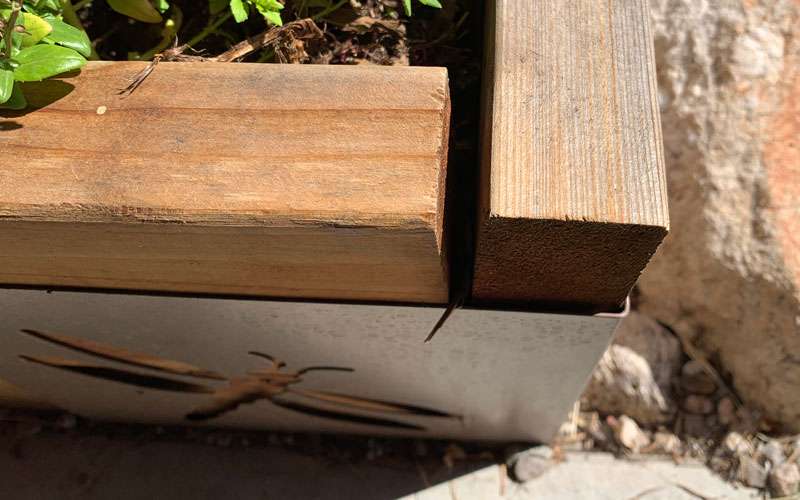
The top planks were pushed apart by the weight of the soil, leaving gaps at the corners of the braces.
You might not mind that, but it bugged the heck out of me. After staring at it for a few weeks, I gave in and screwed the planks together at each corner to give a neater, more finished appearance to the bed.
So much for “no tools needed”!
What I Like
There are two design options (half sun or dragonfly), giving you some flexibility to choose something that fits your design preferences. I like the simple, clean look of the braces.
The bronze-brown powder-coated finish has held up well to rain and blazing sun. It doesn’t appear to have faded and there are no signs of rust. Gravel kicked against the braces, hoses dragged across them and ceramic pots knocked against the surface haven’t chipped or scratched the surface.
The 100% steel Instabrace is sturdy; it hasn’t bent at all under the pressure exerted by the planting mix inside the raised bed.
If you place the raised bed on a perfectly level surface and have someone to give you a hand putting it together, the Instabrace makes it relatively easy to construct the bed.
What I Didn’t Like
Despite Bond’s claim that the Instabrace makes creating a raised bed easy and requires absolutely no tools, I found that this was not the case (unless it’s built on a perfectly level surface).
Other than a shovel, rake and Lesche digging knife (all used to level the ground), I also used:
- a 4-foot level to ensure that the ground and raised bed were level so the braces sat level and boards fit into the corner braces properly
- a cordless drill to pre-drill holes in the top boards at each corner
- an impact driver to screw the bottom boards into the Instabrace corners (a drill with a screwdriver bit would work fine too)
- 1 ½-inch deck screws
Constructing the raised bed was a 2-hour exercise in frustration – not the simple task I’d expected.
Although the boards for each side were cut to exactly the same length, I could not for the life of me get the top boards to butt tightly against each other at the corners after filling the bed with planting mix. The resulting gap didn’t look good so I eventually screwed the corners together.
Warranty
The manufacturer covers the Instabrace with a limited lifetime warranty against defects in materials or workmanship.
Recommendation
Overall, I like the Instabrace. It’s tough, sturdy and good-looking. Under the right conditions, it’s simple to use and doesn’t require tools to set up.
However, “in the wild” of a typical yard or garden, it’s not as easy to use as the marketing material leads you to believe.
If you have the time, patience, tools and a willing helper, you can build a good-looking raised bed with the Instabrace. In that case, I definitely recommend it if you like the look of the braces. Otherwise, I’d go with corner braces that screw tightly to the sides of the bed.
Where to Buy
The Bloom Instabrace can sometimes be found in your local hardware or big box stores, such as WalMart, True Value Hardware or Target. Call ahead to check on availability if you want to buy it locally.
The braces can also be purchased online on Amazon (with free shipping), as well as through Target and WalMart.

Last update on 2026-07-21 / Affiliate links / Images from Amazon Product Advertising API
Enjoyed This Review?
If you liked this review, please sign up for our email updates with reviews, how-to articles and gardening videos!
