Greenworks G-Max 40v Lithium Cultivator (27062): Product Review
We independently evaluate all recommended products and services. If you click on links we provide, we may receive compensation.
This tool will give good results for an established garden bed that needs aerating and amendment incorporating several times per year.
Available on Amazon
Buy ItStarting a new garden bed? Working in some soil amendments? Preparing an over-wintered bed for spring vegetable planting? These are all tasks that can be helped by a cultivator (or tiller), such as the Greenworks G-Max 40v Lithium cultivator.
I have been a big fan of my other cordless garden and workshop tools that run quite well on 20 volt lithium ion batteries. The convenience outweighs any of the limited power issues. So I was anxious to put the Greenworks 40 volt cultivator to the test. Claiming “gas comparable performance without the gas” and “zero carbon emissions in the yard” are great enticements.
Specifications for the Greenworks G-Max 40v Lithium Cultivator
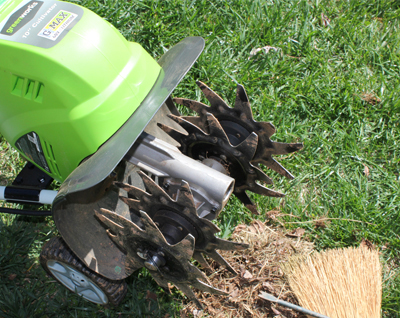
- 4 eight-inch forward rotating tines for easy loosening of soil
- Adjustable tilling width of 8.25 to 10 inches
- Adjustable height for tilling depth up to 5 inches
- 6 inch wheels
- Approximately 40-50 minutes of cultivating per charge
- Charging time in from 1-2 hours
Packaging
The Greenworks Cultivator arrived in good condition. Each part was securely boxed, padded, and protected. However, there was evidence of two tears on the foam cushioned handle although that didn’t seem to be a result of shipping damage.
The box included:
- Cultivator body and separate top handle
- Hitch pins: 2 round and 2 U-shaped
- 2 inner tines and 2 outer tines
- 2 felt washers
- Wheel assembly
- Operator’s manual
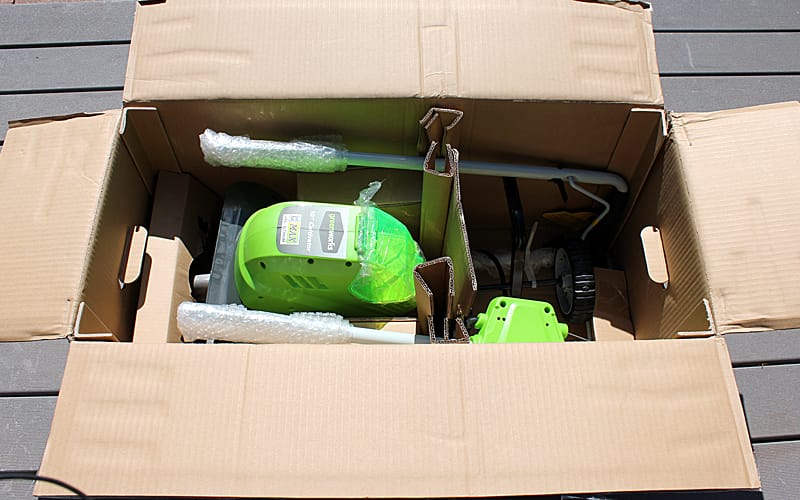
The unit is packaged securely in a sturdy box.
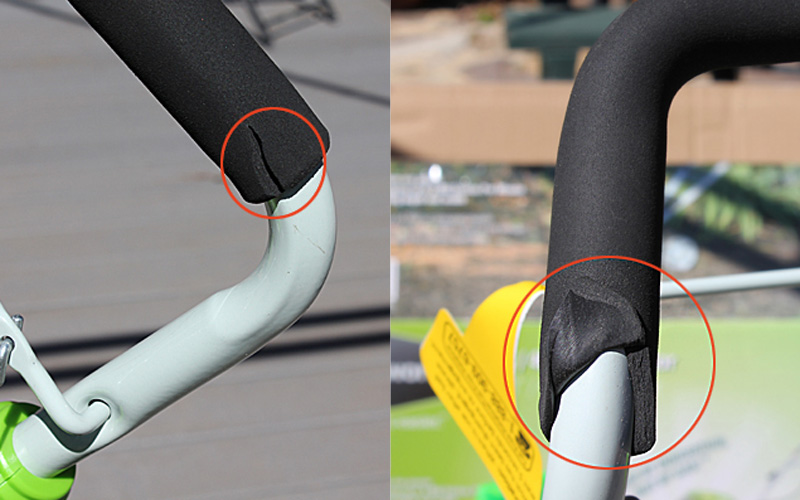
The foam padding on the handle was damaged in two places. This doesn’t harm the use, but shows that it may not hold up over several years of use.
Not listed, but included:
- 1 40-volt lithium battery charger
- 1 40-volt lithium battery

The cultivator comes with a Lithium Ion battery and the charger, plus some confusing instructions.
Charging the Batteries
Charge the battery while you’re assembling the unit – it takes a little over an hour for the first full charge and it must be fully charged before use. The red indicator light turns green when it’s at 100% so you’ll know it’s ready to go.
There’s a handy battery status button on the end of the battery that shows how much charge is left. Just depress the green button and a row of lights will show the percentage of power left.
When not using the cultivator, remove the battery and store it inside in a dry location. Don’t leave it on the cultivator, especially if you’re storing the cultivator in a shed or garage.
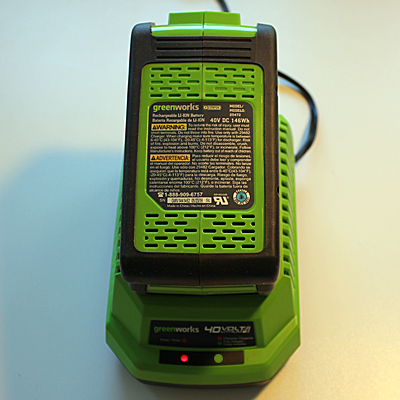
When the battery is fully charged the red light shown here will turn green on the charger.
About Lithium-Ion Batteries
- Do not have a “memory” and can be charged at any time.
- Once the charging light turns green (on the battery charger) remove the battery from the charger.
- Unplug charger when not in use.
- Fully charge batteries when placing them in storage.
- Batteries will eventually need to be replaced.
>> See our full Q&A on Li-ion batteries here.
Assembly and Set Up
Assembling the unit was pretty straightforward except for a couple items.
- First I attached the upper handle and the wheel assembly very easily.
- Then I tackled the tines. And that’s where it got confusing …
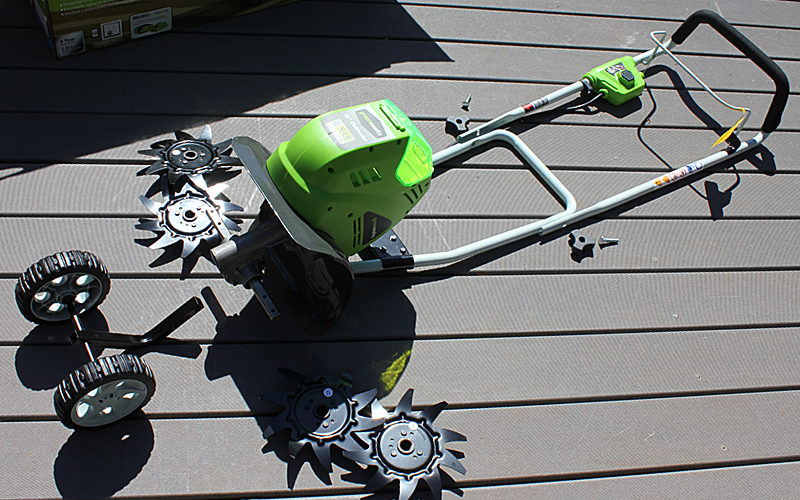
All the parts as they arrive (right out of the box) – minimal assembly required.
Confusing Assembly Instructions
I read and re-read the instructions to be sure I got it right. There were three versions of the same instructions. They were contradictory in one main area–which “hitch pin” to use. The drawings were so blurry and small that it was impossible to deduce which to use. One page said to “insert the hitch pin into the holes located on either side of the tine shaft”, but it didn’t say which type. Then there was a small brown paper insert with a different set of drawings that distinguished the hitch pin from the ring pin. It said to use the hitch pin for using just two tines while using the ring pin when using all four. In the manual it showed the ring pin for the two-tine assembly. For this most important area of assembly I was extremely disappointed in the vague instructions. Sure, I could guess what would work, but with sharp blades I didn’t want to guess.
I also had trouble figuring out how to insert the battery after I got it charged. The manual simply said “insert the battery into the unit”.
So I called the helpline!
The Greenworks helpline representative was helpful and friendly.
She said it didn’t really matter which pin I used. The “O” pin (aka “ring” pin) or the “hitch” pin were interchangeable and more a matter of preference. Some reviewers I’ve seen said they used a bolt instead, feeling it was more secure.
As for the battery, the helpline did confirm it could be pretty stiff and hard to insert. I had been reluctant to force it in and break something, but the helpline staffer assured me that it could be inserted with a little extra push. I gave it a good push and it finally clicked into place.
From there the instructions guided me just fine.
Tilling vs. Cultivating
First, let’s define what a cultivator is and does. It’s not a tiller. Tillers are always gas-powered and are used to cut right through sod to create a brand new bed. For this purpose I always rent a large gas-powered tiller for a day and then gladly return it never to need it again (unless I need yet another bed!).
That said, the terms can be used interchangeably. But it’s good to understand the limitations of a cultivator. If you want to use this small cordless unit to create a new bed you will want to remove the sod first. Cut the sod in small squares with a spade and peel them up and remove them. Then soil amendments can be added and the cultivator can break up the soil and mix it together. It won’t go deeply into hard clay soil.
A cultivator will help break up clumps and create a fine loose soil for planting seeds and seedlings. It will break up weeds and aerate the soil. Too much or too deep cultivation can actually increase weed growth since it brings up weed seeds from below. But there is a great deal of satisfaction in having a clear and clean bed in spring for that early planting. I avoid cultivating later in the summer in favor of mulch to keep the soil cool and moist.
Gas vs Cordless Cultivators
Choosing the type of cultivator to buy is easy if you know the answers to these questions:
- Do I like to mix gasoline and oil?
- Do I like clouds of exhaust wafting over the yard?
- Do I like the sound of a loud engine breaking up the quiet of a spring morning?
- Do I like to drag a 100 foot electrical cord around my small yard?
If you answered NO to all of the above, then you will want to consider a Lithium Ion battery powered cultivator such as the Greenworks G-Max model. I had a small gas-powered cultivator and really liked how it prepped my garden, but hated all those other things about it. So I got rid of it and am happily using this new cordless generation.

Press the black start button and grab the safety handle and pull it up to the main handle releasing the start button. To stop the rotating tines simply release the safety handle.
Putting the Greenworks Cultivator to the Test
To operate the Greenworks cultivator, press the safety-lock out button and then pull the safety handle upwards to the handle bar. Release the safety switch and continue holding the safety handle up to the bar to continue the rotation of the tines. Release the safety handle to stop the tines from rotating.
Not Too Heavy
Since I have raised beds, I have to lift the cultivator into the bed. It’s heavy, but not too heavy for a small lift. If you can handle cultivating with a power tool like this, you can likely manage to lift it.
Lots of Power
I was impressed with the power of the Greenworks G-Max 40V cultivator. In fact, it was so fast and strong that I needed to really hold on and pull back to avoid running right into the edges of the raised bed. Once I got the hang of it, that wasn’t difficult but still a workout.
My garden beds are supported by recycled plastic lumber (it’s a great product that doesn’t rot or leach) but it does get in the way when using a cultivator. It would be much easier to cultivate beds that don’t have hard raised edges.
My over-wintered garden beds are crusted over and have some weeds as well as leaf and grass clipping mulch. After going over the beds I raked the loosened weeds and removed them. Then I went over it a couple more times to further refine the soil. This makes a very nice texture for direct seeding or small seedlings.
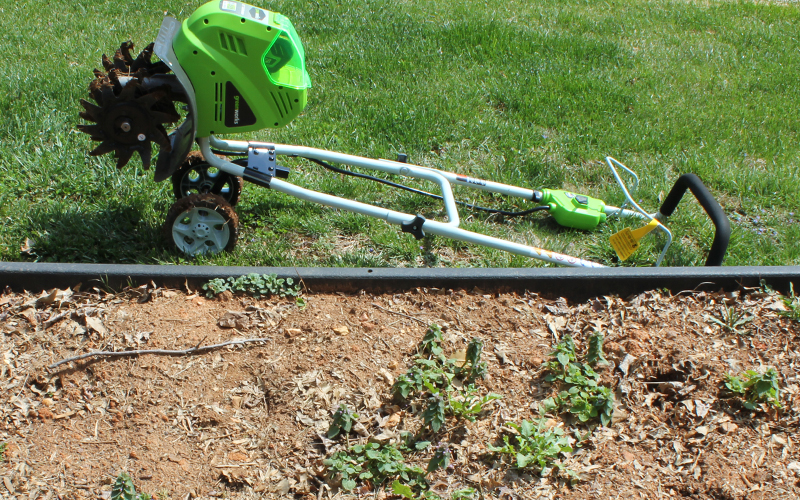
Over-wintered garden with leaves and some weeds ready to cultivate.
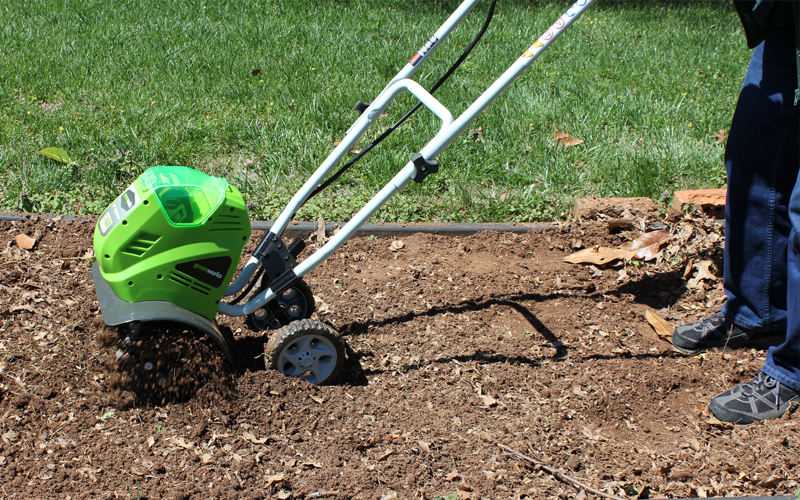
Hold on tight! It has enough power to really pull you forward quickly.
Options for 2 vs 4 blades
The Greenworks G-Max 40v cultivator gives you the option to use either 2 or 4 blades when cultivating. I used the 4-blade setup for cultivating my raised beds. I guess there may be some areas in narrow beds that the 2-blade set up would be an advantage. But for most vegetable garden beds the 4 blades make for a faster result.

Ready to plant.
Depth Adjustment
The depth adjustment is not something I found useful. Either setting seemed to give me the same results. It’s more of a matter of how deep an angle you push the tiller down into the soil or hold it up more parallel. It’s easy to control the depth in that manner.
Easy to Clean & Store
After use, clean the cultivator before storing it. It’s easiest if you let the tiller totally dry so that any mud can be removed from the wheels and the weeds pulled from the tines.
If you’ll be using it again soon, just make sure it’s clean enough to store in your garden shed or garage for easy access.
If you won’t be using it for several months (for instance in the fall after garden season is over), I would remove the tines and thoroughly clean them and coat them with a spray of oil before storing it in the box it shipped in.
As directed, always remove and store the battery separately between uses and recharge as needed.
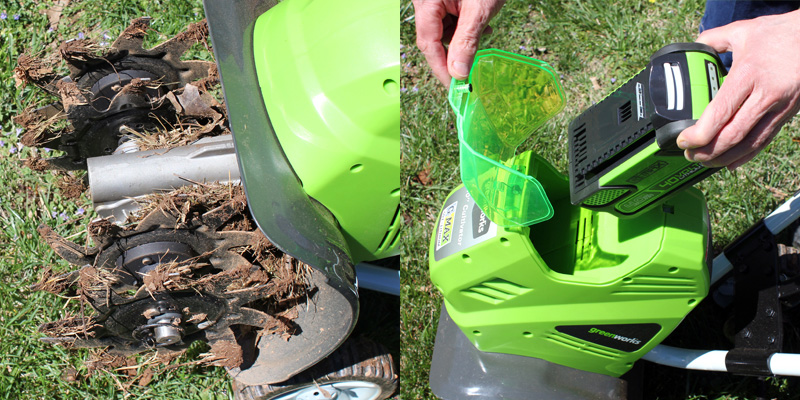
Clean up the weeds, vines, and caked on mud when you’re finished. Remove the battery first!
Ready to store in a dry place until next time.
Importance of Safety
From the Greenworks manual:
- Do not use near underground electric cables, telephone, lines, pipes, or hoses. If in doubt, contact your utility or telephone company to locate underground services.
- If the unit strikes a foreign object, stop the motor, disconnect the battery, thoroughly inspect the machine for any damage, and repair the damage before restarting and operating the machine.
- Do not overload the machine capacity by cultivating too deep in a single pass or at too fast a rate.
- Stay alert. Watch what you are doing. Use common sense. Do not operate cultivator when you are tired, ill, or upset.
- Be aware that the equipment may unexpectedly bounce upward or jump forward if the tines should strike buried obstacles such as large stones, roots, or stumps.
- Wear hearing protection.
- Ensure that people and pets are at least 50’ (15 m) away from cultivator while in use.
Warranty
The tool has a 4 year warranty and the battery is warrantied for 2 years. That’s double the industry standard.
Recommendation
I was surprised by the power and happy with the results. I recommend this machine even though it is quite an investment. But to avoid gasoline and exhaust, I think it’s worth it – IF you really want to cultivate several times per year to keep beds weed free and aerated. It might be overkill for a very small garden where a garden fork would do the work. And it might be underpowered for a really big garden. So, this is a personal choice. The quality seems very good except for the instructions and the foam padding on the handle.
Where to Buy
This model retails at $299 and is available on Amazon for $250 (Prime for free shipping) which includes the battery and charger. Be sure the one you order includes those. They are quite pricy to buy separately unless, of course, you already have other Greenworks 40v tools with compatible batteries. The charger is $40 and the 40 volt battery is $149.
Be aware too that eventually you will have to replace the battery as rechargeable batteries do wear out. Greenworks lists this battery at up to 2000 charge cycles in addition to extended storage times. How many years it will last is difficult to determine but 3 years is typical.
Now over to you – Have you tried Lithium Ion powered cultivator before? What did you like or dislike? Let us know in the comments below!
Enjoyed This Review?
If you liked this review, please sign up for our email updates with reviews, how-to articles and gardening videos!

: Product Review")


Witch green works cultivator works with my 40v pole saw?