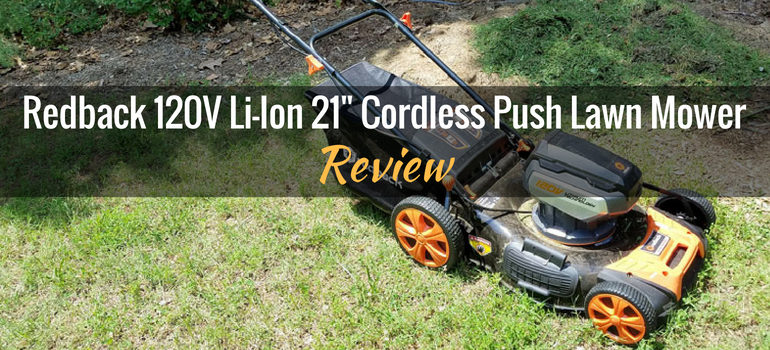
Redback 120V Lithium-Ion 21” Cordless Push Lawn Mower: Review
We independently evaluate all recommended products and services. If you click on links we provide, we may receive compensation.
A high quality, powerful, full-size mower that performs extremely well
Available on Amazon
Buy ItThe Redback 120V Lithium-Ion 21” Cordless Push Lawn Mower is a full-size mower that’s touted as being a replacement for a gas-powered mower. As battery technology continues to improve, we’re seeing more 120V mowers; the increased power allows manufacturers to make wider machines (20-22”) that reliably cut through thick grass. Previous models with 40V batteries were smaller (14-16”) to accommodate the lower power output.
I’m a big fan of Redback tools. I tested and fell in love with the Redback 40V Lithium-Ion cordless hedge trimmers. Then I tested and fell in love with their lightweight yet powerful leaf blower. We also reviewed the smaller 16” 40V version of their cordless mower and found it to be a terrific machine. So I was eager to try out their new 120V Lithium-Ion 21” Cordless Push Lawn Mower.
I was curious to find out if the Redback cordless mower would perform as well as their other tools. Would it be a good option for a homeowner with more than a ¼ acre-sized yard to mow? And is it really a viable substitute for a gas mower?
SPECIFICATIONS
| Weight: | Approximately 65 lbs. (including grass bag and battery) |
| Starting system: | Push button start |
| Drive: | Walk-behind push (manual) |
| Power source: | 120v lithium-ion battery (1 battery and 1 charger included) |
| Motor: | 120V DC Brushless |
| Charger: | 3 Ah |
| Run /Charge time: | Runtime: 1 hour; charge time: 1 hour |
| Cutting width/height: | 21” cutting width; 7-position cutting height (.59” – 3”) |
| Wheel size: | 10” rear, 7” front |
| Extras: | Anti-vibration, foldable handle; mulches, bags, or side discharges; 16 gauge steel deck |
| Warranty: | 3-year limited warranty on lawn mower only; 3-year on battery |
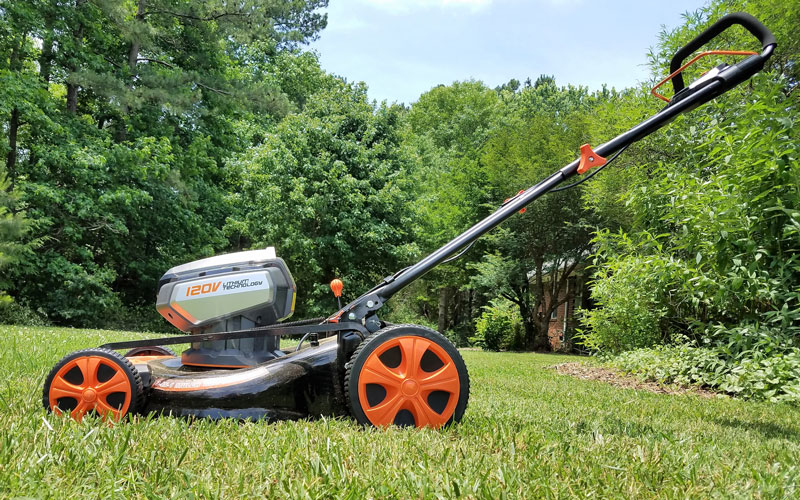
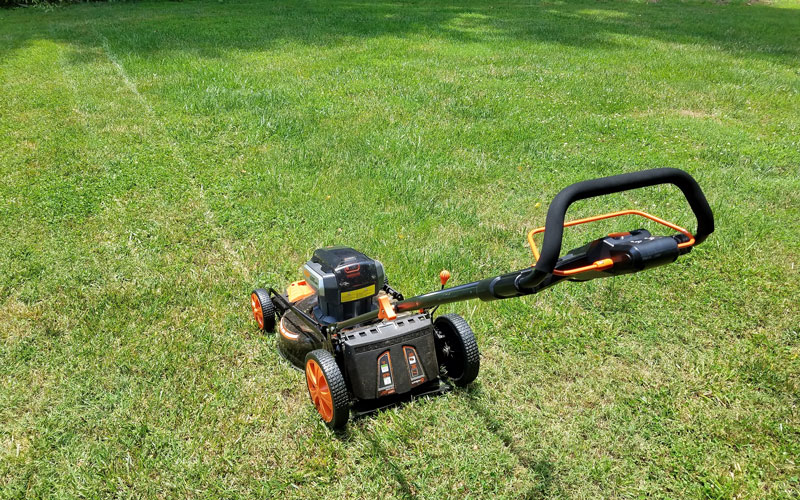
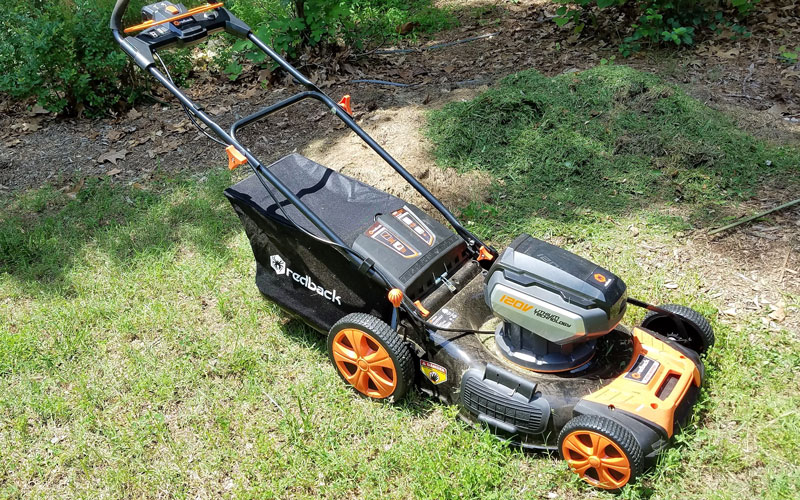
The Redback in its natural habitat
FIRST IMPRESSIONS
The box arrived in good shape, so I was not surprised that when I took everything out of the box, all of the contents were secure and undamaged. Inside the box, you’ll find the mower deck, a partially-assembled handle, one battery, a charger, the manual, and accessories.
The machine appeared to be well-made with nothing tinny or cheap about it.
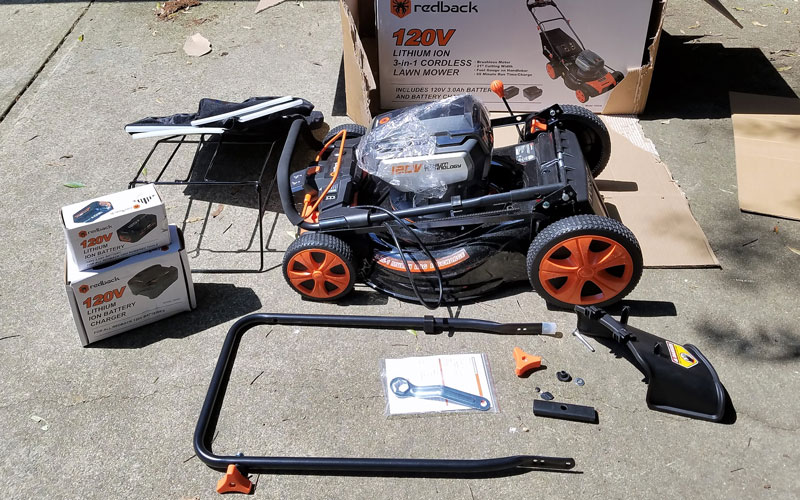
Inside you’ll find the mower deck, a partially-assembled handle, battery, charger, manual, and accessories
Charging the Battery
Today’s batteries are simple to charge and use. After plugging the charger into a standard AC wall outlet, insert the battery into the side slots of the charger until you hear it click into place. The lights on the charger will turn from red (no battery inserted) into a flashing green while charging. When the light stays a solid green, the battery is fully charged. Remove the battery by pressing and holding down the latch button and sliding the battery out of the charger slots.
I recommend you start charging the battery before you assemble the mower. The first full charge will take approximately 50 minutes and it needs to be fully charged before you start mowing. Subsequent charges take about an hour.
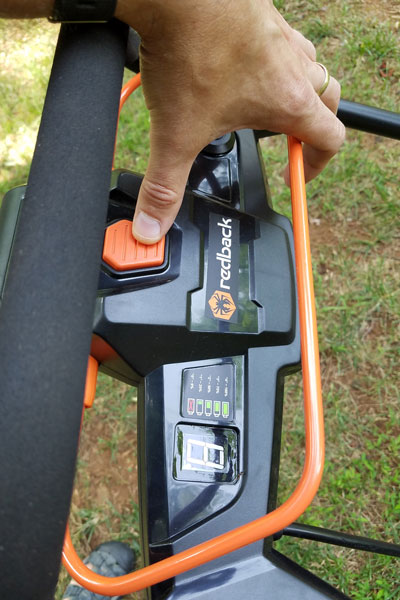
At any time you can determine the battery charge remaining by pressing the button on the battery. The level indicator shows you how much juice is left.

On the side of the charger is a chart that tells you the stage of charging the battery is in. The front of the battery also has a button-light indicator to show battery charging status in real time.
Minimal Assembly Required
To be honest, I get the same terror in my heart trying to assemble a tool that I used to get as a young adult at Taste of Chicago when a voice announced over the loudspeaker, “Security is leaving the premises.” I’m just sure something bad is going to happen, and even knowing to expect it, I feel powerless to change the outcome.
Fortunately, my PTSD was uncalled for. The entire assembly process took only about 20 minutes.
To assemble the handlebars, find the included carriage bolts, washers, orange plastic triangle knobs, hex bolts, hex nuts, and wrench. To attach the lower section of the handlebars to the frame, slide a hex bolt through the top hole on the frame and one side of the handlebar. Do both sides. Begin screwing in a hex nut that protrudes through the end of each hex bolt, and tighten using the included wrench.
Using the included wrench, tighten the hex nuts on both sides
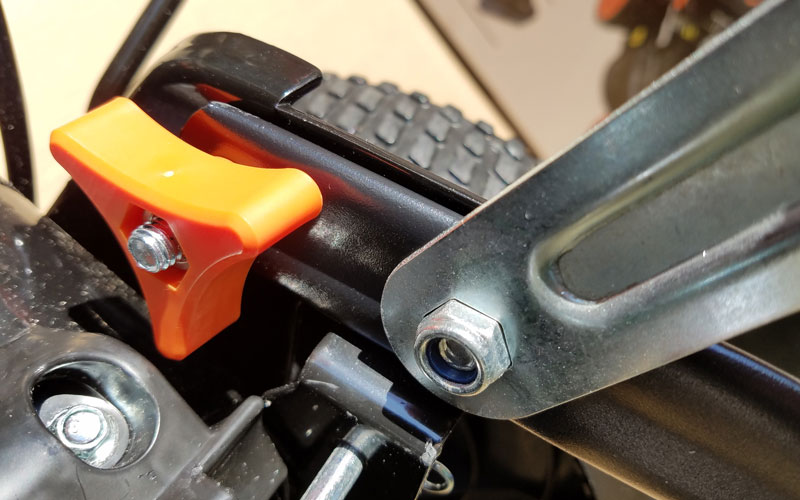
Next, unscrew the triangle knobs from the lower section. Slide the attached bolt from the frame through the hole in the handlebar. Screw a triangle knob over both exposed bolts and tighten.
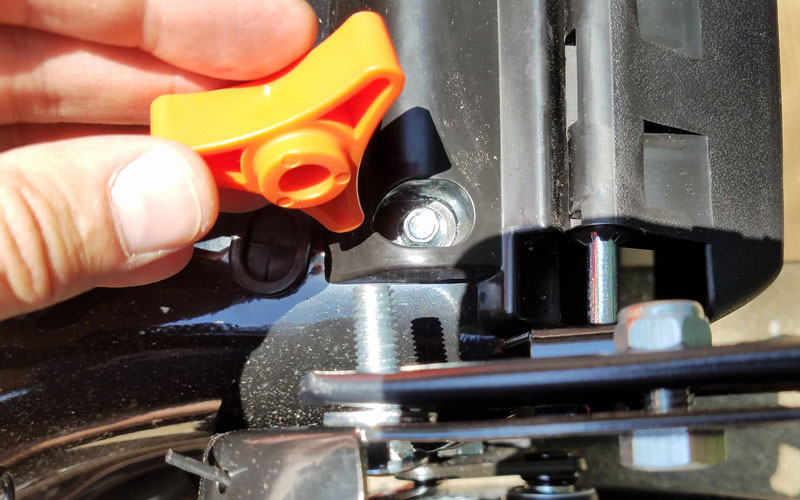
Tighten the triangle knob once inserting the attached bolt through the lower section of the handlebars.
To attach the top section of the frame, select the hole that best corresponds to the length that is comfortable for you. Secure using the included carriage bolts, washers, and triangle knobs.
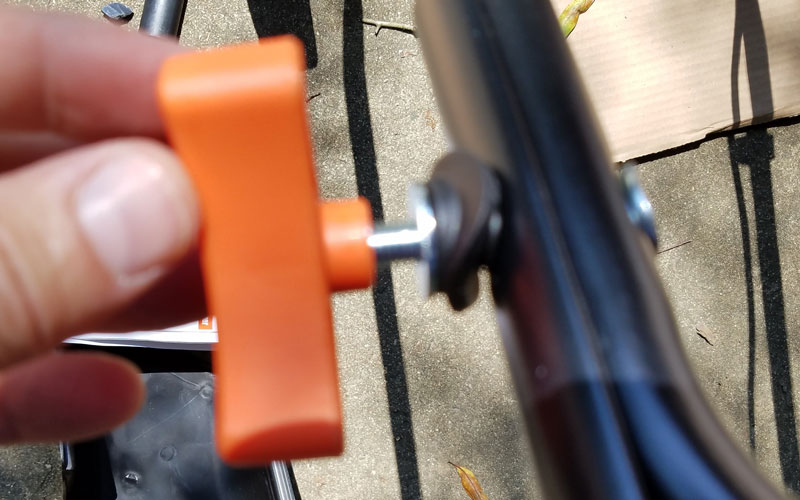
Slide the carriage bolt through the lower and upper section, add a washer to the backside, and tighten with the triangle knob.
Then simply insert the carriage bolt through the handlebar and existing hole. Marry that bolt on the opposite side with a washer and triangle knob. Hand tighten.
The last thing to do is to screw the round orange knob on the end of the height adjustment lever.
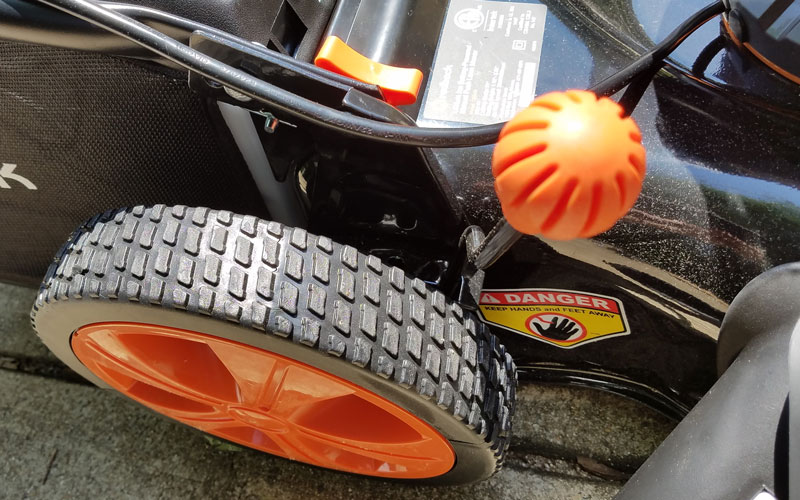
Finally, screw the orange knob on the height adjustment lever.
Poof! Your mower is assembled.
Oh, in the event you wish to use the included clippings collection bag, that requires a few extra minutes to assemble.
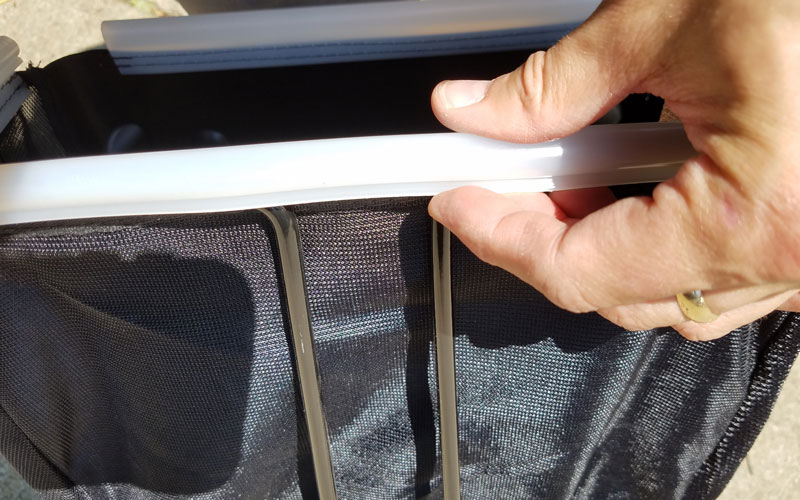
The grass catcher includes a rigid metal frame and a nylon bag.
Drop the bag inside the metal frame until it fits like a glove. Then attach the flexible plastic clips from each side of the bag and clip them around the edge of the metal frame.
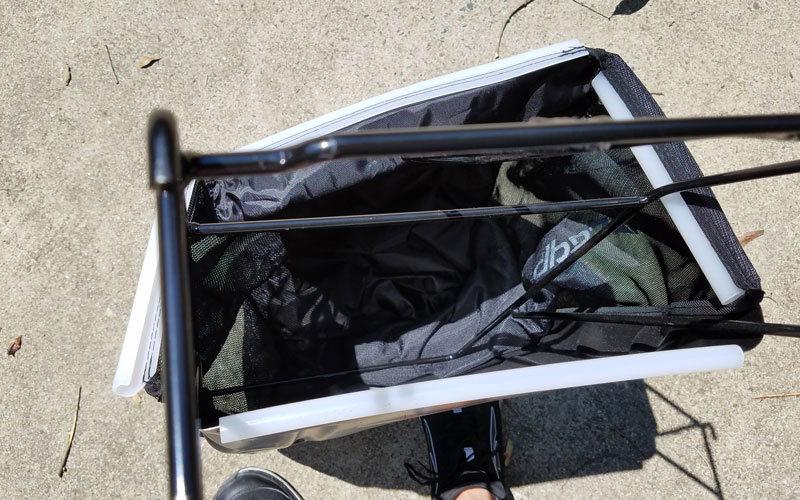
Clip each of the four sides of the bag to the metal frame using the flexible plastic clips attached to the bag.
Three Options For Handling Grass Clippings
The Redback 120V cordless mower can do three things with your grass clippings:
- mulch,
- discharge to the right side, or
- bag.
Mulching
Like many cordless mowers that include a mulching feature, the Redback 120V mower uses a mulch plug to keep grass clippings inside the mower. The unit comes with the hard, molded plastic mulch plug attachment inserted under the back-flap of the mower. Because the plug is only used for mulching, you’ll have to find a handy storage place for it when not in use (don’t lose it!).
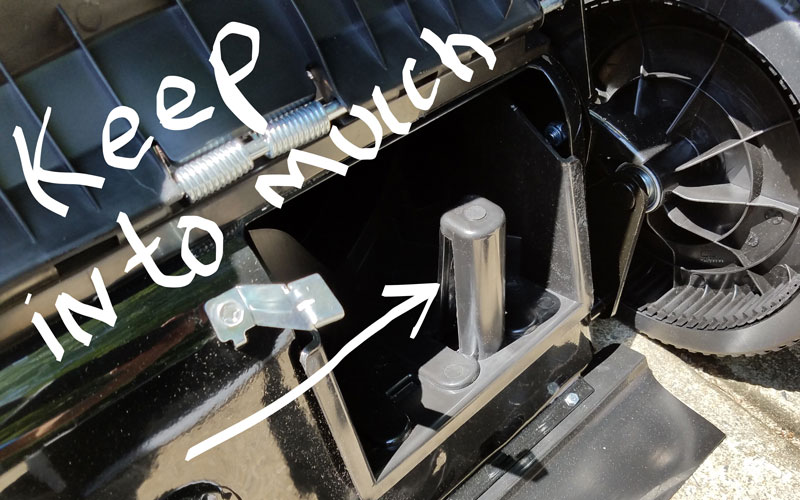
This hard plastic insert underneath the back-flap of the mower stays in for mulching.
Side Discharging
Setting up the side-discharge option requires three easy steps. First, remove the hard plastic mulch plug.
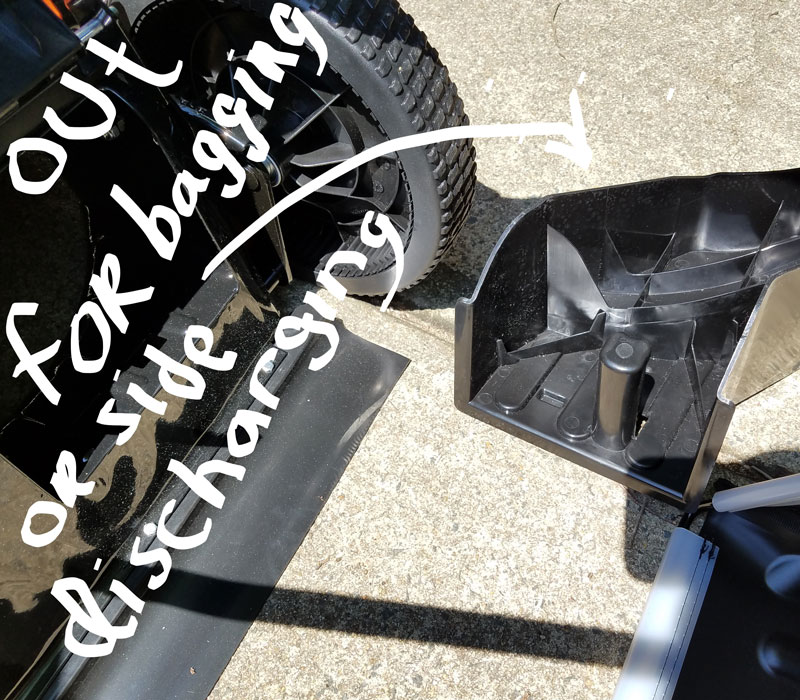
Using the bag or the side discharge options requires removing the plug from underneath the back-flap.
Second, lift up the side-discharge cover. Third, hook the hard plastic discharge chute under the metal pins that are attached to the mowing deck. You’re done!
Shown with side discharge unit installed.
Grass Catcher Bag
Setting up the grass bag to collect clippings is just as simple. First, make sure the hard plastic mulch plug has been removed from the back of the unit. Second, with the back-flap lifted, align the metal hooks on the grass bag with the attached metal pins and insert into the exposed metal rods. Release the back-flap. That’s it. You are ready to go!
SAFETY (FOR YOU AND THE UNIT)
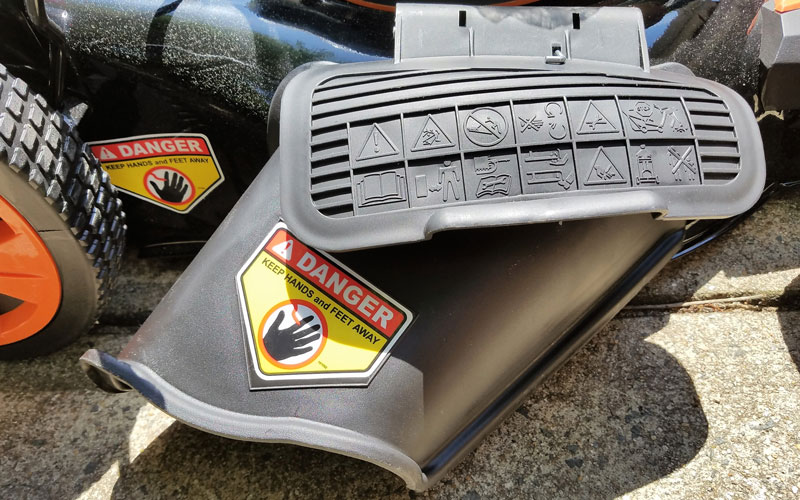
As always, you should wear safety glasses and closed-toed shoes when operating any sort of power equipment. Even though the unit is significantly quieter than typical gas mowers, I’d still recommend hearing protection. For added protection of your body or the mower blade, pick up any rocks, branches, pinecones, and other debris that may be in your path before mowing.
Using the 120V Li-Ion Battery
Once the battery is charged, slide it out of the charger. Open the battery compartment located on top of the mower.
Shown with battery compartment open slots on the top of the mower
Slide the battery in following the slots inside the compartment. Keep pushing until you hear it click into place.
Once you lower the lid, you cannot see the battery charge indicator lights. That doesn’t bother me, but if you like to know how much charge is left in your battery as you’re mowing, you may find that annoying.
Since I have a large yard, I mow until the battery is drained. Then I recharge. And after each use, I recharge it again. Since the 120V lithium-ion batteries don’t have a “memory” like earlier generations of batteries, there’s no downside to keeping the battery fully charged and ready at all times.
Read our Lithium-Ion Battery FAQs >>
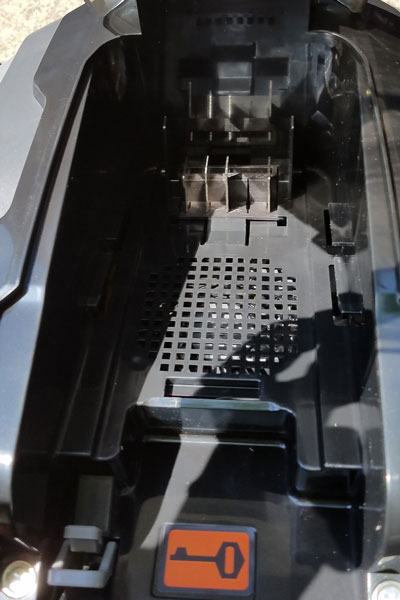
As an added safety feature, the Redback comes with a “key” underneath the battery compartment. To prevent unauthorized access to your mower, simply remove the key. The unit will NOT start unless the key is inserted.
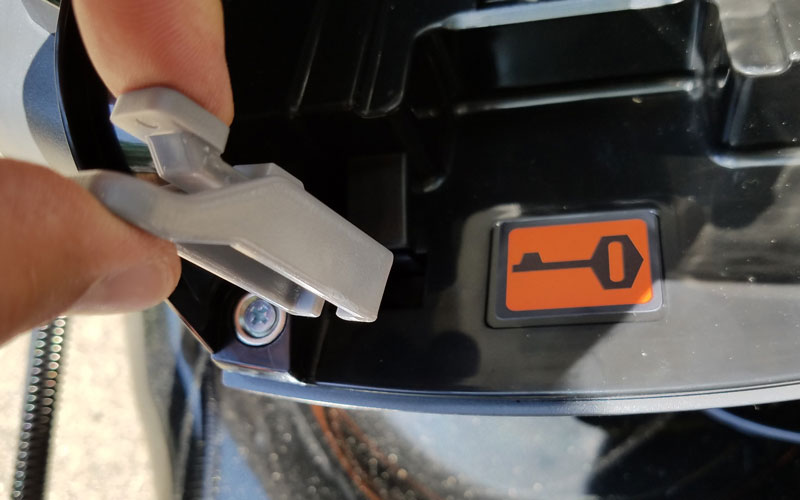
Remove the key to prevent unauthorized access of the mower.
Cutting Height Adjustment
Next, set the cutting height to the level that suits your tastes. The Redback mower has 7 heights to choose from, ranging from just over ½ inch up to 3 inches. I tested it on all heights but found the middle notch worked best for the length I like my grass. Lawn care professionals generally recommend mowing grass to somewhere between 2 and 4 inches (see our article on lawn mowing tips for details) – the Redback mower tops out at only 3 inches.
Adjust the desired height of your cut using the orange knob.
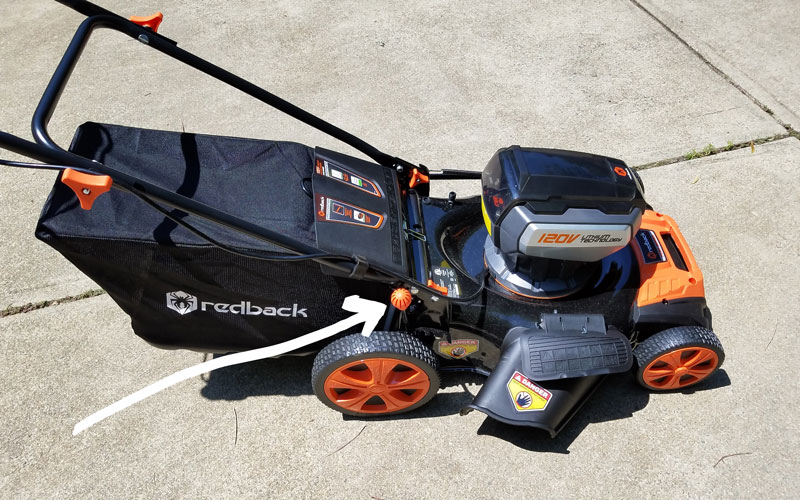
START YOUR BRUSHLESS MOTOR!
To start the mower, press and hold down the big, orange ON switch. Then pull the power activation bar towards the handle while holding down the ON switch. Let go of the ON switch, and start mowing! Utter simplicity. To stop the unit, release the power activation bar.
Just hold down the big orange button and pull the orange bar towards the handle
PUTTING IT THROUGH THE PACES
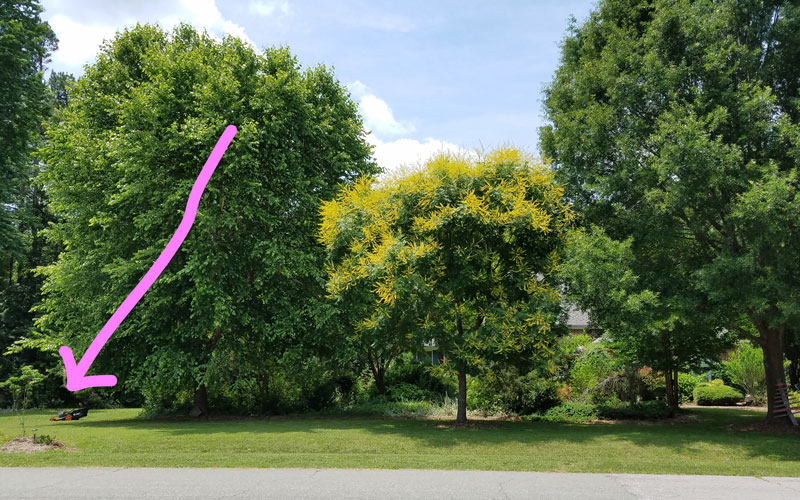
I should say a few words about the size of my lawn and my “grass” situation. My yard is about ½ acre. Typically, I use a riding mower to save time. But when I have the time, I like using a push mower for exercise. My yard is relatively flat with one long slope in the front. I have several flower beds and mulched landscaped areas of trees that are shaped like kidney beans.
As far as my lawn goes, if it’s green and it grows, I call it grass and live with it. My “lawn” is a mixture of fescue, clover, crabgrass, Bermuda grass, and some invasive beast I’ve heard referred to as Asian grass. My riding mower does a good job mowing all that grows in my lawn. Add a sharp enough blade and enough RPMs, and everything cuts nicely. But not every manual mower I’ve used can handle the tall, stiff Bermuda grass. It tends to bend or break the stalks instead of shearing them off cleanly.
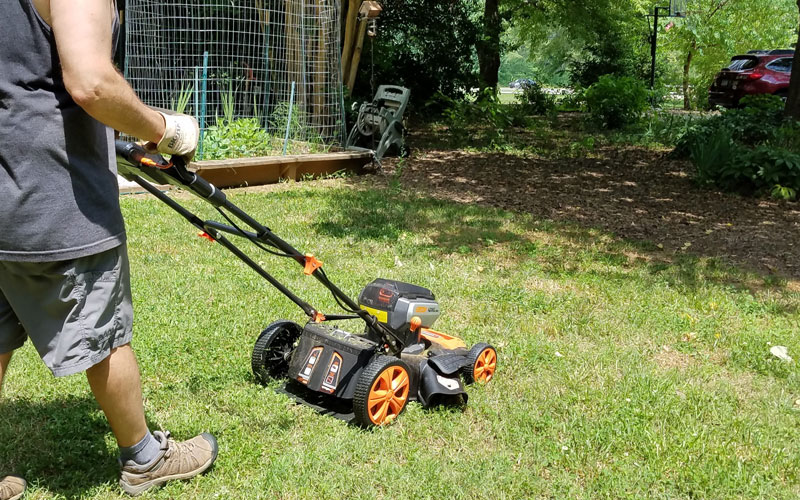
For my tests, I used the mower as a mulcher, then used the side-discharging feature, and finally the grass catcher. In all cases, the mower cut cleanly and the blades of grass were cleaved, not thwacked to death.
Learn how to sharpen a lawn mower blade >>
Mulching Performance
While my riding mower claims to mulch, I immediately found that the Redback mower did a better job of making the clippings virtually disappear in my lawn.
The mulching feature left a clean, nearly grassless path in its wake.
I have other mowers with cutting decks ranging from 18” to 48”. For some reason, I prefer the look of thin rows on my lawn. The 21” Redback cordless mower left nice, tidy rows from the wheels without patches of grass behind it.
On one charge, I cut more than half of my lawn, which comes to just over ¼ of an acre. The battery lasted just shy of an hour.
One charge lasted about an hour, or just over a quarter of an acre.
Side-Discharging Performance
After recharging the battery, I used the Redback with the side-discharging feature. To go from mulching to side-discharging, remove the hard plastic plug from the under the back-flap of the mower (don’t forget to put it somewhere safe).
This feature worked well; however, the side-discharger left clumps of grass behind, especially in taller grass. But then I can’t think of a single reason why someone would want to use a side-discharge option when the mower can mulch or bag. So after a few minutes, I decided to try the bag on for size.
Shown with side discharge feature
Bagging Performance
This year I started a vegetable garden. I started one last year, too, but I somehow forgot about it and almost everything died. To prevent a replay of last year, I upgraded the watering system, tilled and freshened the soil, and put up temporary fencing to keep out the critters.
I read one more thing that I wanted to try: spreading a thin layer of grass mulch at the base of my plants. Not only does grass mulch break down and feed the plants over time, it prevents weeds while helping the soil retain moisture. Yeah, I’m sure you knew all that, but I’m not a gardener, so it was new to me.
With my desire to collect grass clippings in mind, I got out the bag. To go from side-discharging to installing the bag is simple. Remove the side-discharger. Then lift up the back-flap. Align the metal hooks on the bag to the metal rods under the back-flap. Release the back-flap. Poof!
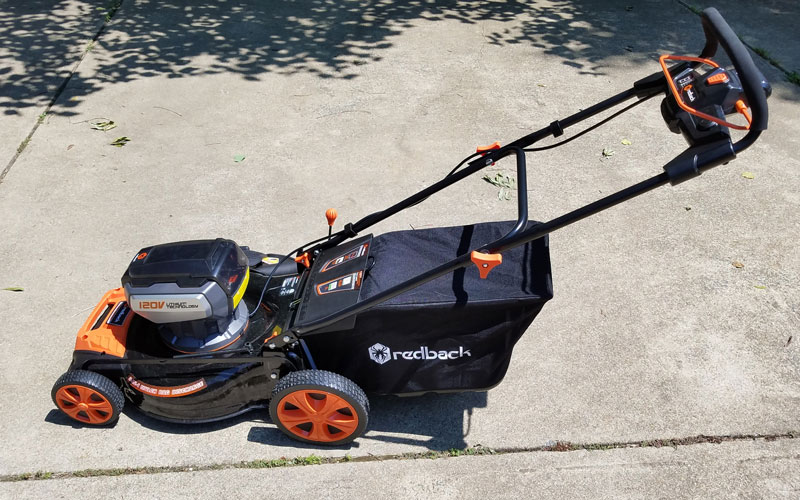
Shown with the bag attached.
The Redback grass bag doesn’t come with an indicator to tell you when the bag is full. So I resorted to what I did as a kid: I gently kicked the back of the bag to see how full it felt to my foot! When the bag is soft, it still has more room. When it feels hard, it’s full. Another way of telling how full it’s getting is seeing errant grass clippings coming out from the bag connector area. Once the bag is full, the grass has nowhere to go so it tends to spill out any opening it can find.
Shown next to my growing pile of grass clippings.
I don’t know the exact capacity of the bag, but it tended to get full about the same time I needed to rehydrate from the 90° heat. I found the bag feature easy to attach and empty.
Highly Maneuverable
It didn’t matter if I used the side-discharger, mulcher, or bag, the lightweight Redback mower, and oversized rear wheels made cornering, turning, and pivoting a breeze.
In all, I put 3 full cycles through the battery and mower. I never had a problem with it stalling, nor did it fail to restart after using it.
IS IT TIME FOR YOU TO GET A REDBACK MOWER?
Here’s what the Redback has going for it:
- Well made. I’ve owned other Redback products, and this one is of the same high quality.
- Maneuverable. This particular unit doesn’t have a self-propelled feature but it’s lightweight and the oversized rear wheels make turning corners and doing 180° pivots easy.
- 3 options for your clippings. You can shoot clippings out the side, bag them, or mulch them into your lawn.
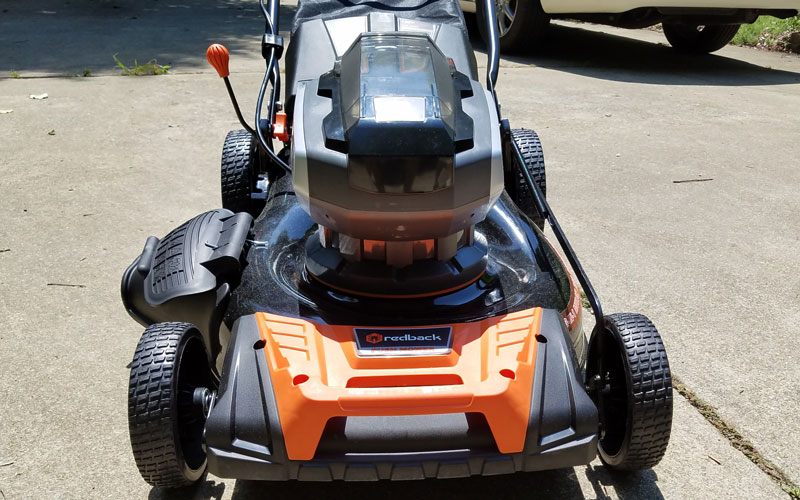
Not a bad looking frontend.
- Easy start. Push start, hold in the safety and engage the blade start lever. To stop, let go of the start lever. No yanking cords, futzing with a choke, or flooding the unit.
- Battery run-time. I got about 1 hour use when using the side-discharger or mulching feature. The battery lasted about 50 minutes when using the bagger, likely because of the extra weight.
- Green. No gasoline, pre-mix ratios, fumes, or intolerably loud noise. It’s quieter than any gas-powered alternative, and it doesn’t use fossil fuels.
- Power. The Redback neatly cut everything in its path due to its sharp, well-balanced blades.
- Cost. Redback products are nicely priced in the middle of the market to attract first-time product buyers or current product owners looking to upgrade.
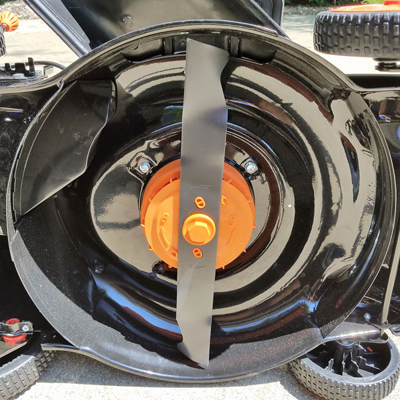
The real business end of the Redback mower.
On the other hand, there are a few minor drawbacks:
- No external battery indicator. To see how much charge is left, you have to lift the battery compartment cover. It would be easier if there was an indicator on the handle or exterior of the compartment.
- Cutting height tops out at 3 inches. The pros recommend a cutting height of 2 to 4 inches, depending on the type of grass.
- Lacks a grass bag fill indicator. Kicking the bag to see how full it is really isn’t a great solution. Most grass catcher bags have a small flap that stops flapping as the bag fills.
Before buying the Redback mower, ask yourself a few questions—
- Battery charge time. Since I own other 120V Redback products, I can always have a charged and ready battery on hand. But with a one-hour charge time, will you have the patience if your yard requires more than one charge?
- Yard size. If your lawn is a ¼ acre or less, you should be able to mow your lawn using one fully charged battery. If your yard is bigger, are you willing to wait while your battery charges or purchase an additional battery?
- Manual (as opposed to self-propelled). I like the Redback 120V cordless mower because I see it as an opportunity to use a few muscles in both my upper and lower body. Are you okay with pushing a mower instead of passively guiding it like you can with a self-propelled unit?
WARRANTY
According to their printed manuals, Redback offers a 3-year limited warranty (for defects in materials and workmanship only) on the lawn mower and the battery.
RECOMMENDATION
If you’re looking for a quality-made, reasonably priced, cordless push lawn mower, check out the Redback 120 Volt Lithium-Ion 21” Cordless Push Lawn Mower. I’d consider it to be a good alternative to a gas mower for lawns up to ¼ acre (that’s about what you’ll get with one battery charge). And while you’re at it, check out their trimmer and leaf blower, too. Since all units run off the same 120V lithium-ion battery, you’ll never have to worry about not having power at your fingertips.
WHERE TO BUY
You can find the Redback 120V cordless push mower on Amazon for $499.99 and up, depending on the seller.

Last update on 2026-07-20 / Affiliate links / Images from Amazon Product Advertising API
Enjoyed This Review?
If you liked this review, please sign up for our email updates with reviews, how-to articles and gardening videos!


Thanks for the review! It helped me narrow in on a buy.
Glad it was helpful!
So which do you like better, this one or the Yard Works 120v that you’ve also reviewed?
That’s a tough question, Chuck. They’re both terrific machines – either would be a great choice. Personally, I (Monica) like the Redback better because it’s a little lighter. But the Yard Force has a few more “bells and whistles” and is self-propelled so Scott likes that one better. It really comes down to what’s most important to you.
I was going to buy one 2seasons ago,but wotu no self propel I went with the 120v Yardforce..2 battery ports only 2.5 ah..but essentially 5ah
Going to try and make an adapter to use the redback batteries in the yardforcd
would you recommend the 120v redback over the 40v?
That’s a tough one to answer, Mike. As with most of these things, it depends… The 40V machine is smaller (only 16″ wide so cuts less with each pass), but it weighs half as much as the 120V and has an external battery life indicator. For a smaller yard or someone who doesn’t want the size and weight of a 21″ machine, the 40V is awesome. But if you have a larger yard and don’t want to be going back and forth with only a 16″ cutting width, or if you’re looking for a replacement for a traditional gas mower, then go with the 120V.
I’ve been using a Greenworks 20″ 40volt for over a year now, and its done great!
However, after seeing a Closeout price on the Redback 120 volt, I decided to dive in.
I also bought the Redback blower. As I didn’t have one. Both come with a battery. 3ah with the mower and 2ah
with the blower. Sure hope it works out! Love my Greenworks, but, its only 40v.