Seed Starting, Part 2: What To Do After Germination
We independently evaluate all recommended products and services. If you click on links we provide, we may receive compensation.
Discover what to do after your seeds germinate, transforming into healthy, robust plants. Our guide is packed with essential tips and valuable resources for post-germination care, perfectly tailored for gardeners aiming to maximize their plant growth. Before diving into these advanced steps, ensure you have a solid foundation by exploring our comprehensive seed starting tutorial. Once you’re up to speed, enhance your understanding further by watching our latest tutorial video below, which provides a detailed look at nurturing your sprouted seeds.
If you missed the first video on How to Successfully Start Seeds, be sure to check that out first, as it will get you started on growing a great garden – whatever your skill level.
>> Download: When to Start Seeds Indoors
We also have for you an easy-to-follow written guide on when to start what.
1. Light
Your seedlings will need light, but they also need periods of rest (darkness) too. A good rule of thumb is to turn the grow lamps off when you go to sleep, and turn them on when you wake up (or use a timer). Read all about different types of grow lights here.
Seedlings need blue night and red light. Sunlight includes both. Red light stimulates the growth of leaves and flowers. Blue light regulates the growth/size of plants.
Don’t use incandescent light, use fluorescent. Full spectrum bulbs include both red and the blue light, or you could use one warm (red) light and one cool (blue) light.
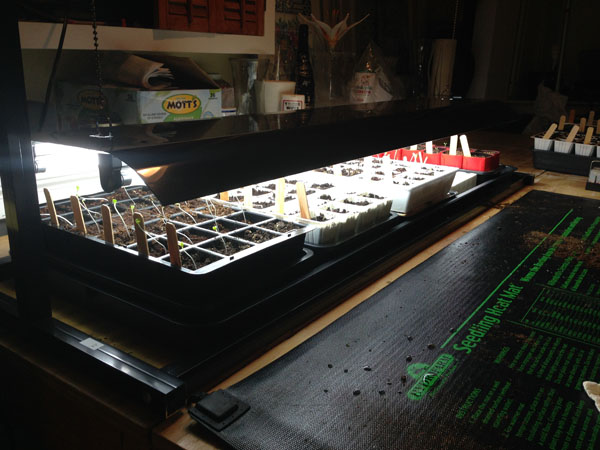
The grow lamp should be about 2-4 inches above the seedlings, so adjustable lights are helpful. You can find the Tabletop Garden Starter® Grow Light Kit shown in the video (and in the photo above) from Gardener’s Supply.
Be sure you clean the lightbulbs, as dust and dirt can cut down on the amount of light emitted.
Hold your hand above the seedlings. If it feels warm, the light is too close.
2. Water
Water from below, not above, to ensure that you don’t squash the seedlings. Make sure your seedlings aren’t sitting in water, or you’ll have issues with rotting, fungus, and soil gnats.
Your seedlings might need to be watered if:
- The soil looks lighter
- The soil pulls away from the edge of the cell
Self-watering seed starting kits use capillary mats, but be sure to check the water levels on those as well.
3. Food
Seedlings need food when they get their “true leaves.” The first leaves that come up are typically embryonic leaves from the cotyledon (part of the seed) so look for the second (“true”) leaves to appear before you start fertilizing. Use fertilizer at a weaker strength than you would for full-sized plants.
There are several different options for how to fertilize your seedlings. The ones shown in the video are Sustane Compost Tea Bags and Alaska Fish Fertilizer 5-1-1 Concentrate 1 Quart
4. Airflow
Your seedlings will be healthier and more sturdy if air is flowing above and around them. A fan can be used – we recommend putting it on a timer, just like your grow lights.
5. Room to Grow
Most people put more seeds than are needed in each cell, so you’ll need to either (carefully) pull out the weaker ones from each cell, leaving one healthy one, or cut them off at the base. Monica demonstrates both methods in the video.
Be sure to check your seed packet to see how long it should take your seeds to germinate. If no seedling has appeared by a few days later than expected, sow some new seeds.
6. A Bigger Pot (optional)
It’s not needed, but if you’re not moving your seedlings into a garden for several weeks, you might want to transfer them to a larger container. If your plant is about two times the size of the container it’s in, or you can start to see roots below the cell, you might want to move it to give it more room to develop, access to more nutrients and more moisture, and the roots will have more space to grow. A 3 to 4″ pot should work well.
If you’re reusing pots, be sure you wash them well before you use them.
You can also use Eco-friendly Seed-starter Cowpots, which you eventually plant into the ground, adding nutrients and organic matter to the soil.
Use a potting mix (such as the Organic Potting Mix, 20 Qts. from Gardener’s Supply) when you transplant your seedlings. Make sure that it is adequately moist – if you grab a handful and squeeze it, it should hold together, but if you move your hand, it should fall apart (see the video at about the 23 minute mark for a demonstration of this).
When transplanting, never grab a seedling by the stem, or you could damage or kill the plant. It’s better to try to push it up from the bottom of the cell, and try to take it out in one piece.
After transplanting, be sure to still water your seedling from below.
Important note: when you do move your seedlings outside, you need to do something called “hardening off,” which is slowly exposing them to the conditions they will encounter in your garden.
7. Label
Be sure to label your seedlings so you know what they are!
Ones shown in the video include ones similar to these seed markers. The garden stakes from Botanical Interests are currently sold out. One of our YouTube viewers also suggested using venetian blinds as labels. We thought that was a great idea!
What are you growing from seed this spring? Let us know in the comments below! And don’t forget to subscribe to our YouTube Channel.
