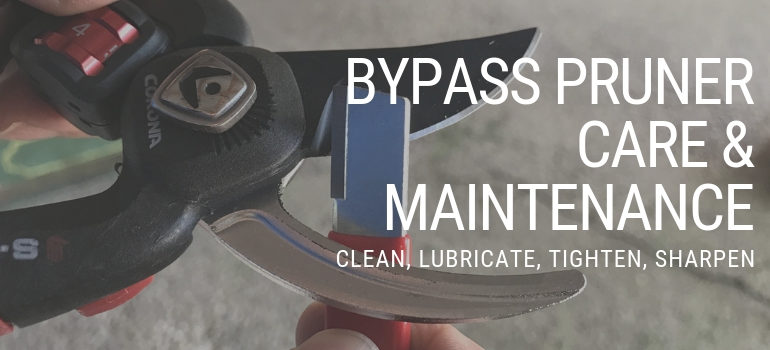
Bypass Pruner Care & Maintenance: Cleaning, Lubricating, Tightening & Sharpening
We independently evaluate all recommended products and services. If you click on links we provide, we may receive compensation.
There are four areas to focus on to keep your bypass pruner in good working condition:
- cleaning the tool,
- lubricating moving and metal parts,
- tightening all the nuts, bolts and screws, and
- sharpening the cutting blade.
Cleaning Your Bypass Pruner
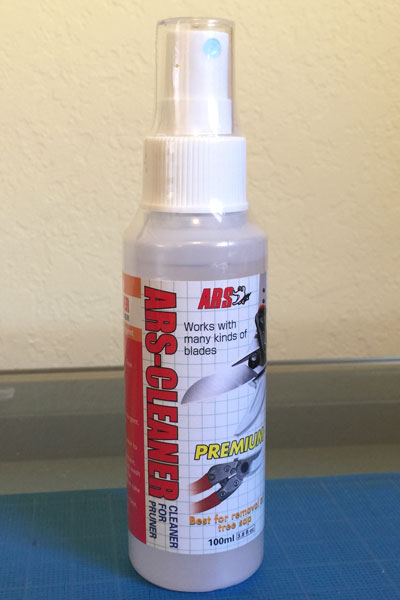
ARS offers a cleaner specifically for removing sap from blades
The first step is always to make sure your tool is as clean as possible by removing all dirt, dust, and sap residue. Toward that end, ARS makes an excellent product specifically formulated to remove sap from blades. The ARS Blade Cleaner is available on Amazon and typically retails for under $14 (The image on Amazon shows Japanese text on the bottle. It's made and shipped from Japan so shipping can take a few weeks.)
See It In Action >> How To Clean Pruner Blades (and Remove Sap!)
It may seem obvious, but always keep your pruners out of the dirt and out of the rain. Dirt and sand particles caught between the blades wreak havoc on the sharpness and so does rust from leaving them out in the elements. Toss your pruner into a gardening bag, stick it in your pants pocket or place it in a sheath that hangs off a belt around your waist – just don’t leave it outside in the yard! Purchasing a quality pruner is an investment; taking care of it will yield years of faithful service.
Lubricating a Bypass Pruner
Several parts of a pruner need regular lubrication to keep the tool working smoothly:
- pivot point
- spring
- locking mechanism
- handle (on models with a rotating handle)
- blades
The pivot point between the two blades (where the handles connect with a thru-bolt) is the most obvious lubrication point on a bypass pruner. A regular shot of lubricant there works wonders on how smoothly the pruner opens and closes.
Depending on which type of spring your pruner has, you’ll either need to remove it or lubricate it in place.
For a Volute spring, open the pruner handles wide open and compress the spring to remove it from the two posts. Put some lubricant on both the inside and outside of the spring and squeeze it together a few times to make sure the lube has fully coated the spring. Compress the spring and insert it back onto the two posts.
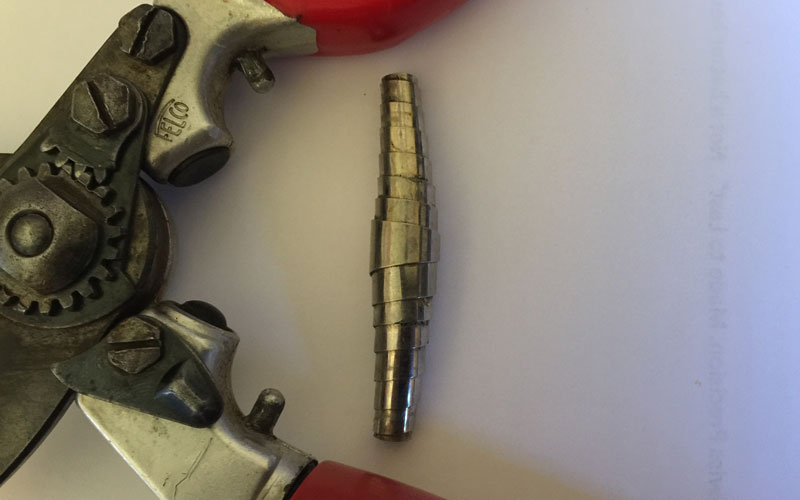
Put some lubricant on the outside and inside of the spring and squeeze together to distribute the lube
For those pruners with a helix (coil) spring that’s permanently attached to the handles, do your best to apply some lubricant to the spring. It’s not meant to make it work better; rather, it helps protect the metal against rust.
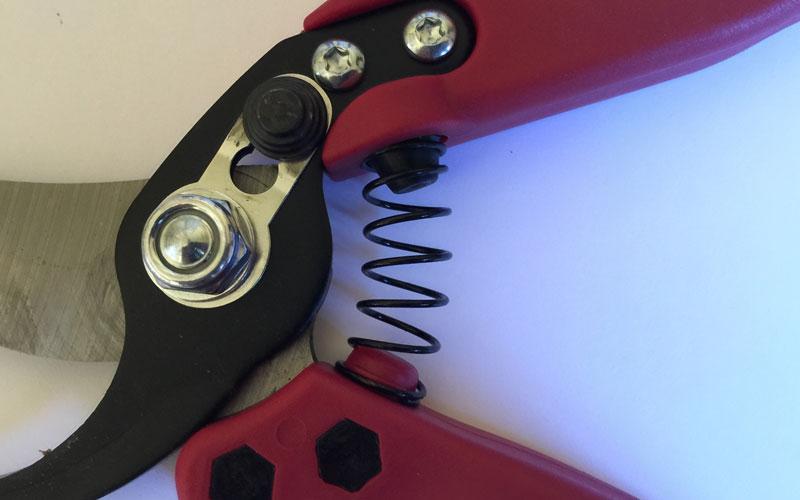
With fixed coil (“Helix”) springs, do your best to lubricate it in place. An aerosol spray lubricant is the easiest way to do this
Don’t forget about the locking mechanism – there’s nothing worse than having the lock seize in the locked position!
If your pruning shears have a rotating (or rolling) handle, pull the handle off (a sharp tug should do it) and lubricate the shaft. That will keep it rolling smoothly.
And finally, make sure the blades get some lubricant too. It’ll help prevent sap from sticking to the blades and protect them from rust.
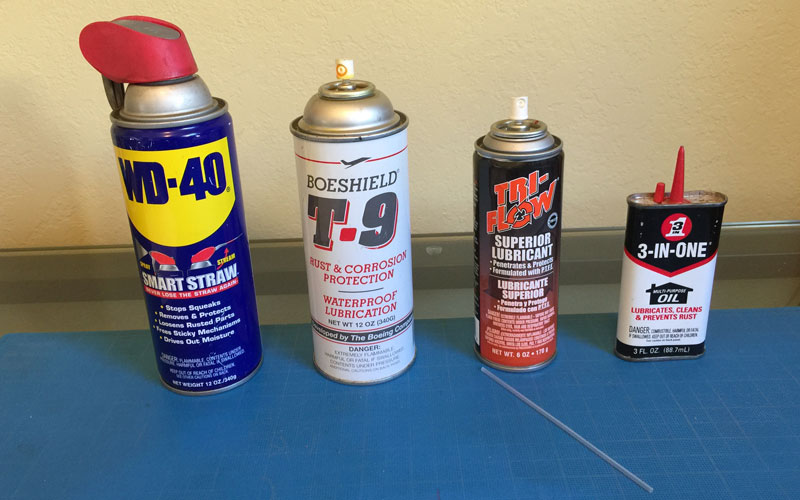
Lubricants For Bypass Pruners
There are several very good lubricants on the market today that will work well for your bypass pruner. Some pruner manufacturers also offer their own brands, which the purist may prefer to use.
Overall, a lubricant like the ubiquitous WD-40® will do the trick. It’s a great product to not only lubricates but minimizes rust as well. I’ve used WD-40®, as well as similar products like Boeing Aircraft T-9 (Boeshield®) and 3-In-One™, all with good results.
But I’m kind of a snob when it comes to lubricants. My personal favorite is Tri-Flow®. What makes it unique is that it contains PTFE (also known as Teflon™). When added to a lubricant, Teflon™ reduces friction and wear, making it superior to other lubricants.
My personal experience is that the Tri-Flow® formulation “stays-put” longer than the other lubricants listed above. From my perspective, the Tri-Flow® formulation is extremely slippery and the best product when lubricating areas with very tight tolerances, like between the pruner’s blade/handle pivot point, locking mechanisms and spring. It’s also an excellent lubricant for folding hand saws for the pivot point between the blade and the handle, and the different blade locking mechanisms. Quite frankly it’s a good lubricant for anything that needs it.
Tri-Flow® is offered in both a spray and liquid form. I like the aerosol spray because the can comes with a long straw that attaches to the nozzle so it’s easy to get a good shot of the stuff into tight places.
If you’re interested in giving Tri-Flo® a go, you can easily purchase it on Amazon. Another good option for finding it is in bicycle stores.
No products found.
WD-40 can be purchased just about anywhere (I’ve even seen it in pharmacies). And brand-specific lubes are often best purchased from the manufacturer themselves via their website.
Lubricants for pruning shears and other cutting tools
Tightening Pruner Parts
Make sure that all nuts, bolts, and screws are tightened. You don’t want to overtighten them and strip the threads, but they can’t be so loose that they either fall out or affect the proper blade-to-blade tension.
The space between the blades (tension) should be set so that the handles open and close freely and yet are tight enough to make precision pruning cuts (no ragged edges or woody material stuck between the blades).
Sharpening Pruner Blades
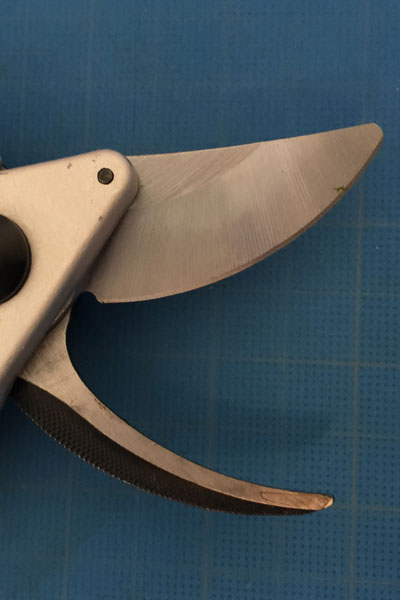
The top blade is called the “cutting” blade and the bottom blade is called the “counter” blade
First, let’s talk a little bit the sharpness of the blades. Some manufacturers recommend sharpening your pruning shears daily. Unless you make a living from pruning (e.g., you work in a grape vineyard or fruit tree orchard), then this practice is overkill.
But as soon as you see that your pruning cuts leave ragged edges or will not cleave through the stem without getting stuck in your pruner, then it’s time to re-sharpen your blades (and also check the tension between the blades).
Bear in mind that some manufacturer’s warranties are voided if you try to re-sharpen the blade. Fiskars® is one company with this policy. Check out the warranty information on your pruner before you start touching up those blades. I’ve found that in the Fiskars® case they usually have replacement blades that can be purchased if yours become damaged.
Blade Sharpening Techniques
Below you’ll find two videos on how to sharpen bypass hand pruners. The first is a more in-depth one that covers a couple of different tools and techniques, while the second video goes into detail on using a carbide sharpener.
Different Approaches to Sharpening Pruner Blades
When it comes to proper cutting edge sharpening, I’ve seen two different methods for handling the back of the blade (the part that makes contact with the counter blade).
The most common method calls for you to “deburr” the blade. I interpret that to mean that the manufacturer wants you to gently remove any burrs but not sharpen the back of the blade. You do that by making a single pass over the flat side of the cutting blade, keeping your file or sharpening tool flat against the blade. On the other hand, Felco recommends sharpening the back of the blade to a 50 angle and the front to 230.
My advice is that you sharpen the front side of the blade at the same angle it was when it came from the factory. On the back of the blade, I prefer a flat surface. I believe that the best cuts are achieved with a blade that has a “chisel” edge (one side beveled and the other side flat).
Of all the bypass pruners I’ve reviewed, the “chisel” edge geometry is by far the most common. If you own a Felco bypass pruner you might attempt the 50 backside bevel, but be careful not to go beyond that (you could easily end up with a 100 angle or more) because it will compromise your cut. I’ve owned a pair of Felco 7’s for 23 years and I’ve never put an angle on the back of the blade. In other words, I’ve only deburred them. The blade has been sharpened probably 50 times (as I never had to replace the blade – this attests to Felco’s superior quality) and I have never had a problem. I know a Felco purist would disagree, but if you’re going to sharpen your own bypass pruners (and not take them to a professional sharpening service), I’d recommend the 00 back blade deburr method.
Last update on 2026-07-11 / Affiliate links / Images from Amazon Product Advertising API
Enjoyed This Review?
If you liked this review, please sign up for our email updates with reviews, how-to articles and gardening videos!

