As a chipper, the Yardmax is the best I’ve used, and the shredding function is pretty darn good, too.
Available on Amazon
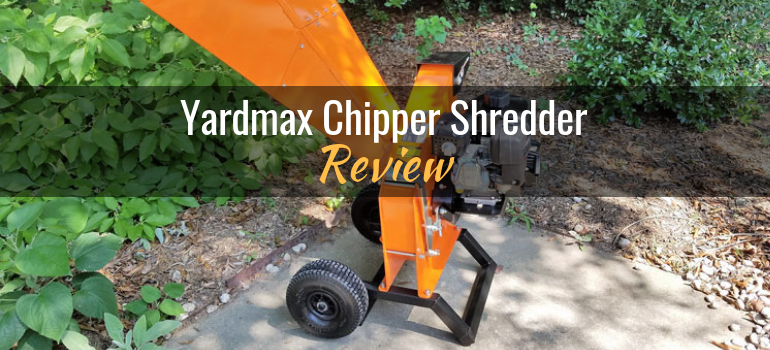
Buy ItYardmax Chipper Shredder (YW7565): Product Review
We independently evaluate all recommended products and services. If you click on links we provide, we may receive compensation.
Yardmax recently introduced a new chipper-shredder (model YW7565). It’s a heavy-duty machine that promises to make quick work of branches up to 3 inches in diameter. While it’s not quite commercial-grade, it does have a 90 day warranty for commercial use and should be more than enough for pretty much any property owner.
I put it to the test with everything I could find to throw at it. Here’s what I discovered …
SPECIFICATIONS
| Feature | Details |
|---|---|
| Weight | 226 lbs. |
| Engine | Briggs & Stratton® - 4 cycle engine (no gas + oil mixture required) |
| Displacement | 208cc |
| Chipping capacity | 3 inches |
| Chipper blades | 2 steel chipper blades |
| Shredder blades | N/A (the chipper blades also serve as the shredding blades) |
| Reduction ratio | 10:1 |
| Impeller speed | Unknown |
| Collection bag | None |
| Fuel tank | 3.25 qt capacity |
| Oil | 18 oz SAE 30 (included) |
| Hopper/Chute | 21" x 14" combined chipped and shredder hopper |
| Wheels | Two 10" x 4" pneumatic tires |
| Other features | Adjustable discharge chute |
| Warranty | 2-year residential; 90-day commercial |
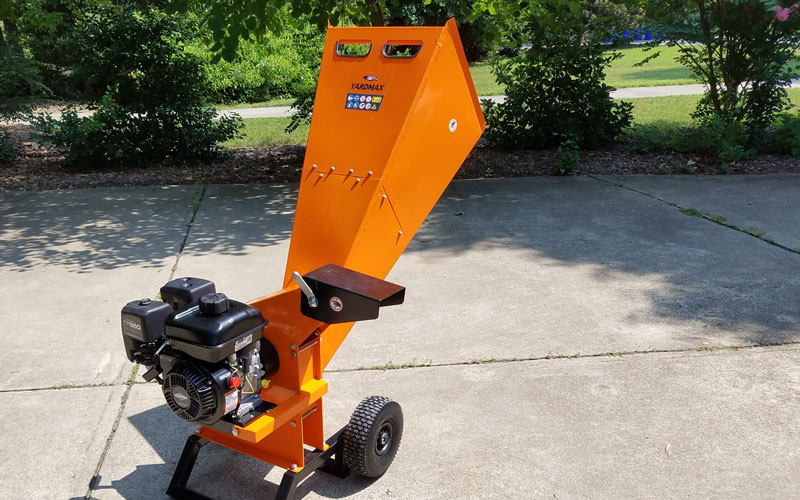
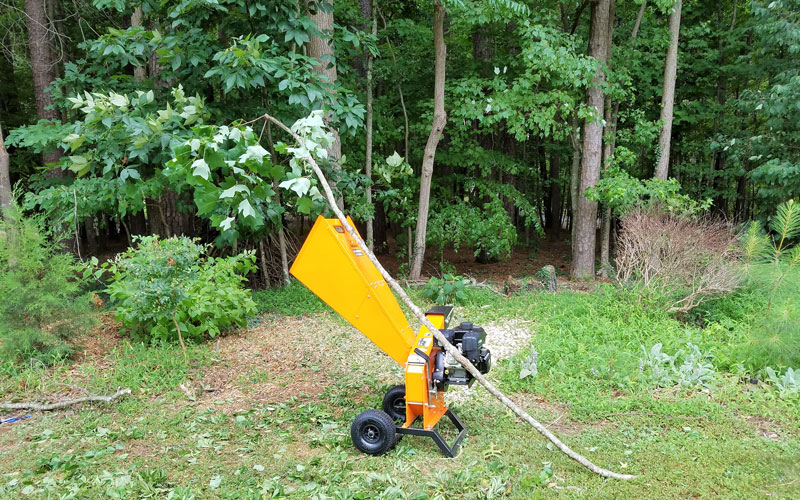
Assembled, the Yardmax looks like a leaning early prototype of Robot from the Lost in Space TV show
Assembly Is a 2-Person Job
The delivery company called me to schedule delivery around my convenience. Since the unit is quite heavy (226 lbs), they needed a truck with a lift gate to get it off the truck. At the appointed hour, the truck rolled up, and the driver brought the unit into my garage on a pallet.
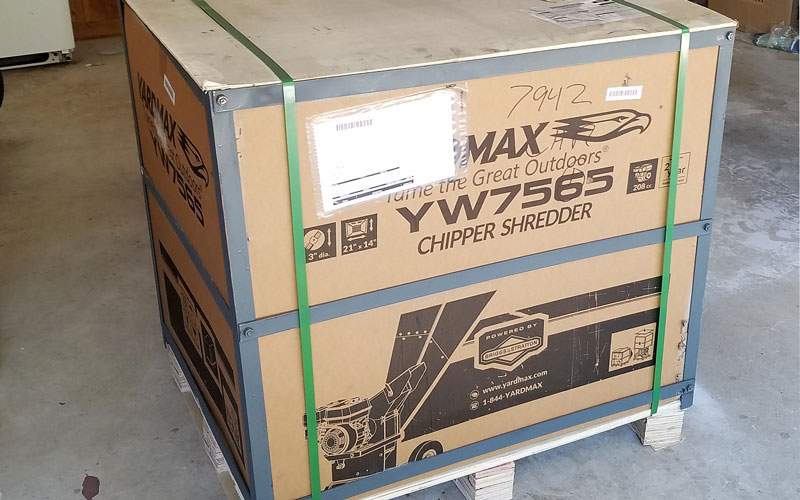
At first glance, the size of the package had me a bit intimidated
I first cut the straps that secured the box to the pallet and then removed the steel frame from around the box using a socket wrench and Phillips head screwdriver. That frame did a nice job of keeping the contents safe and ding-free during shipping.
A steel frame further secures the box from damage in transport. You’ll need some tools to remove it.
Inside the box, the contents were snug and secure due to the Styrofoam padding and additional straps holding the parts together. You’ll need kitchen shears, pruners or some other cutting tool to remove the straps.
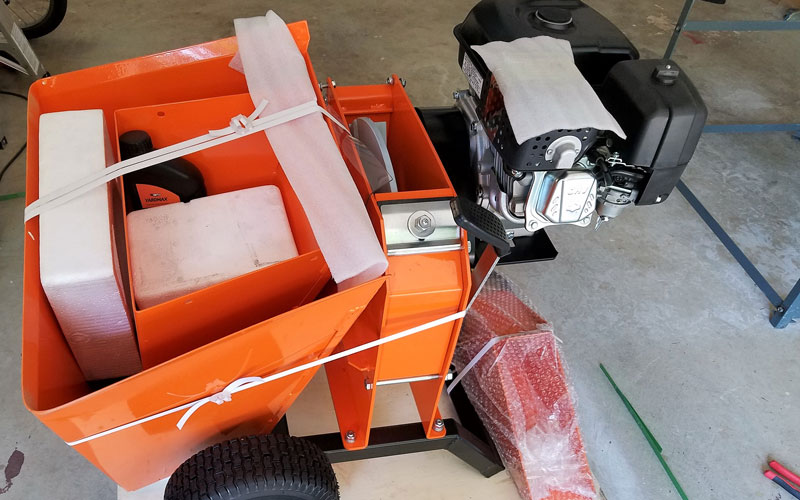
With the box removed, I could see the tool compactly stored inside and well secured with straps and padding
Since my wife was out of town, I had no choice but to sit down and read the assembly instructions.
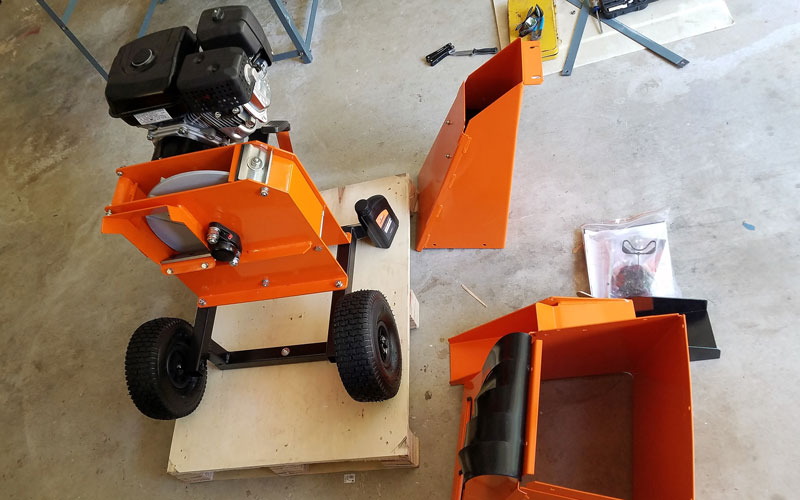
After removing all straps and taking off the newly-freed parts, it was time to read the assembly instructions
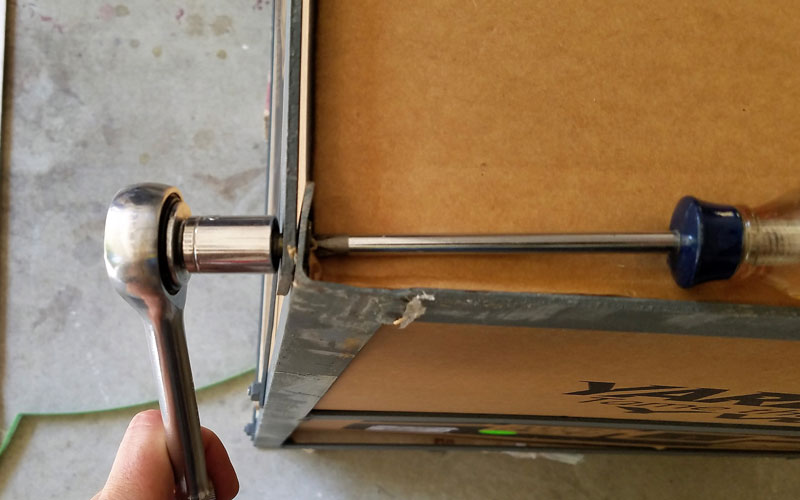
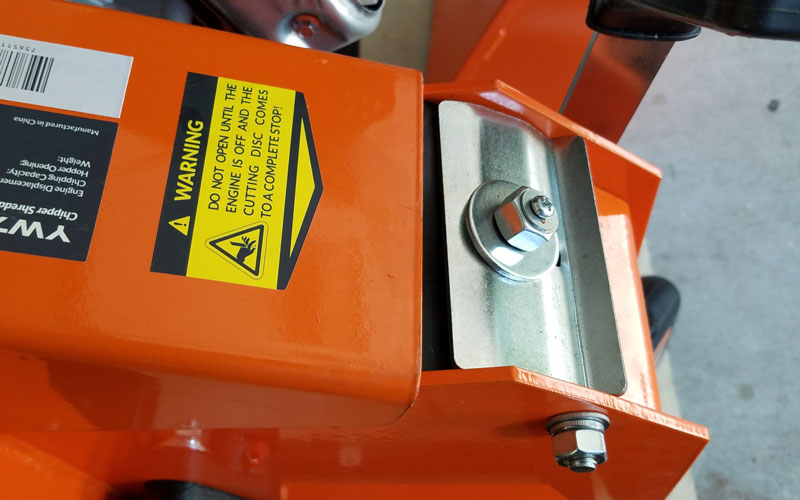
The first step is to attach the discharge chute to the frame, which requires you to first remove the bolts, nuts and washers from both sides of the frame. Then slide the bolt through the chute and frame with a washer between both the bolt and the nut.
Attaching the discharge chute would be more easily managed with two people: one to hold the chute, one to insert the bolt. This won’t be the only time I will write that the assembly process is really a task for two.
It’s not easy to get the bolts in place while holding the discharge chute; this task really needs two people.
I was able to do it by myself, but it wasn’t easy. And yes, I know in the photo the nut is on backwards. I did that on purpose to make sure you’re still paying attention. And yes, after taking the photo, I put it on the right way!
I didn’t have an easy time tightening the bolts and nuts. They were very close to the frame. Instead of a socket wrench, I used a couple of channel pliers. Eventually, I got them tight and the discharge chute was solidly in place.
Discharge chute mounted to frame with one of the two bolts almost tightened into place
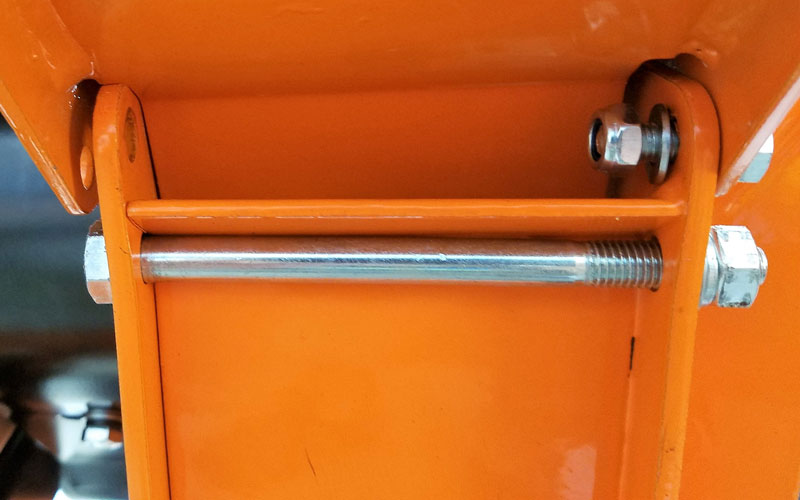
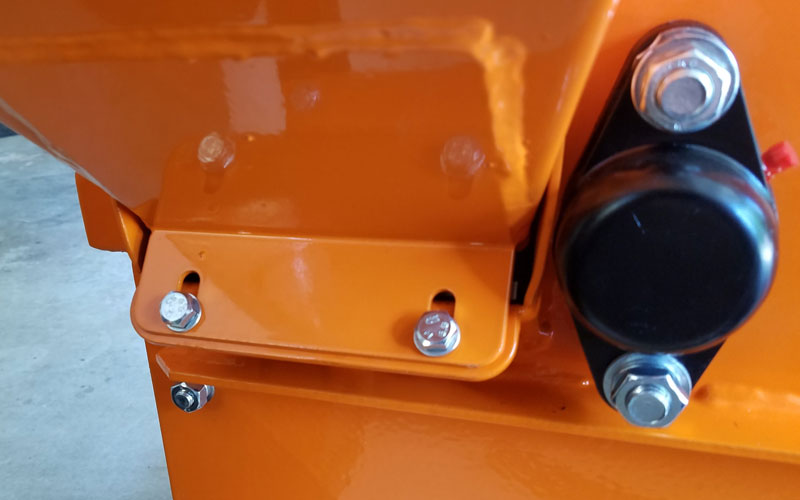
Once the chute is attached, loosen the screw-bolt on the opposite side of the unit that attaches the discharge chute under the clamp to the frame. Lift the metal clamp up and over the front of the chute while tightening the screw-bolt back into place. This secures the discharge chute from near the impeller blades to the where chips will discharge once chipped up.
Once the chute is secured with the bolts, loosen the screw-bolt and slide the metal clamp up and over the end of the chute to secure it to the other side of the frame
Now it’s time to assemble the hopper, which is done before the hopper is attached to the frame. Place the wide part of the hopper (which will eventually be the top) on a solid surface. Then raise the lower half over the top half, and slide it into the slots. You will find 3 screw holes on two of the sides, and 2 screw holes on the other two sides. Line them up and hold in place while sliding a bolt through each hole.
Attaching the top portion of the hopper to the lower portion
Again, this would be easier with two people. Once I got one bolt through each side, I decided to push all bolts through and finger-tighten the nuts before securing with a wrench. To get the bolts through the hopper requires that you stick your arm into the hopper to hold down the head of each bolt while tightening the nuts (on the outside) with a socket wrench.
Now you are ready to attach the hopper to the frame. Forgive me if this sounds redundant, but this part REALLY could use two people. I lifted the hopper into place, aligning the holes on the hopper to the holes on the frame. Balancing the hopper ON MY HEAD, I inserted the bolts and tightened them down while taking this photo.
To attach the hopper to the frame, lift and hold it into place while using the included bolts. Tighten into place.
After taking an aspirin for my headache, I knew that I was in the home stretch.
The final step was to unscrew the final bolt that secured the entire frame to the pallet. Once I unscrewed that bolt, I rolled the Yardmax off the pallet and into better light.
The Yardmax was assembled, and there was rejoicing in the land
Before running the unit, I filled it with the provided oil. Unscrewing the dipstick, I emptied the entire contents into the crank case using a funnel (not included). Then I removed the temporary rubber gasket from the fuel tank and screwed in the permanent gas cap (provided).
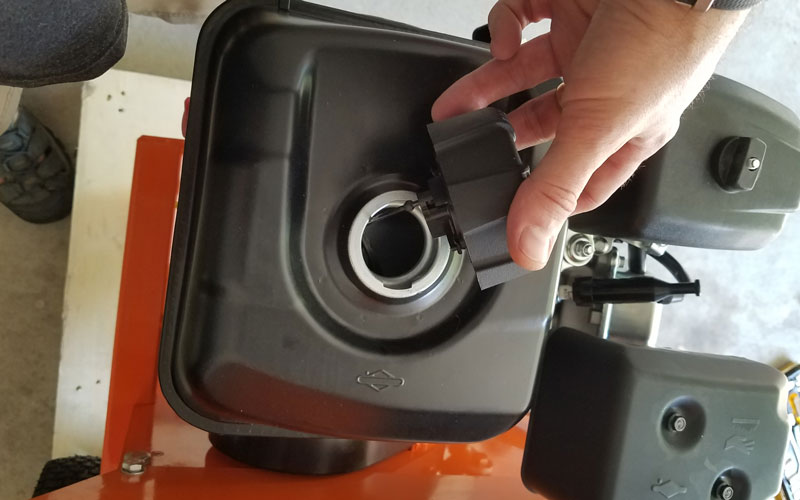
Remove the temporary rubber gasket and screw in the gas cap
SAFTEY FIRST
What I’m about to say goes for any chipper/shredder you might use. Wear safety goggles. Debris flies everywhere, and goggles protect your eyes from the side better than safety glasses. Also, wear some hearing protection. While the Briggs & Stratton 208cc engine isn’t as loud as other engines I’ve used, save your hearing so you can enjoy some music when you’re done. Wear close-toed shoes, too. Leather gloves are a must to keep your hands from getting shredded along with the branches.
And consider wearing long pants and a long-sleeved shirt. At times, debris goes airborne, either while chipping or once the chips ricochet off the ground. By the time I fired up the motor, I looked like I was wearing a HazMat suit. The outdoor temperatures were in the high 90s and it felt like I was wearing a sauna for one. But the parts that I didn’t sweat off remained safe throughout the testing.
STARTING THE CHIPPER/SHREDDER
For cold starting, make sure the throttle and choke levers are both moved to their furthest left position. You don’t need the choke for cold starting.
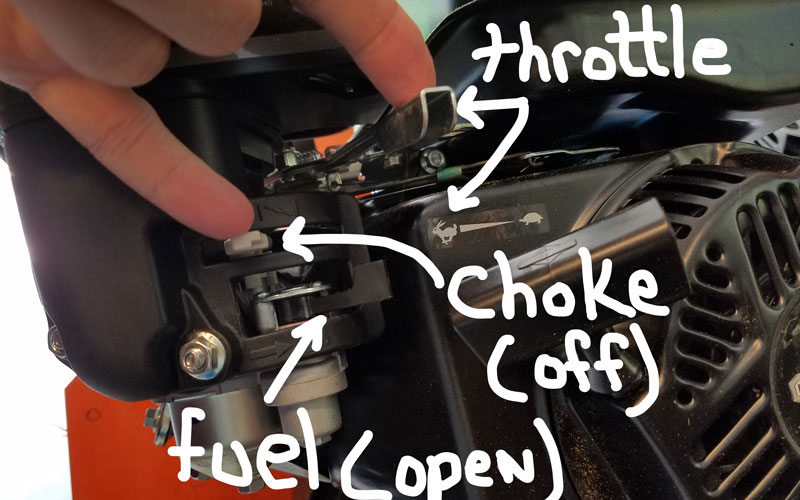
For cold starts, make sure the throttle is open (rabbit), the choke is closed, and the fuel is open
Then flip the unit into the ON position.
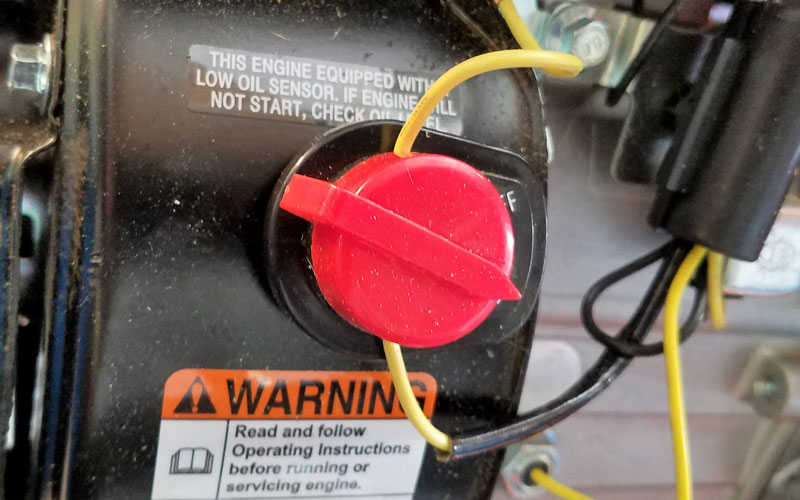
Flip into the ON position
Pull the starting cord slowly until you feel resistance. Once you feel it resist, pull straight back rapidly and slowly return the cord to the original position.
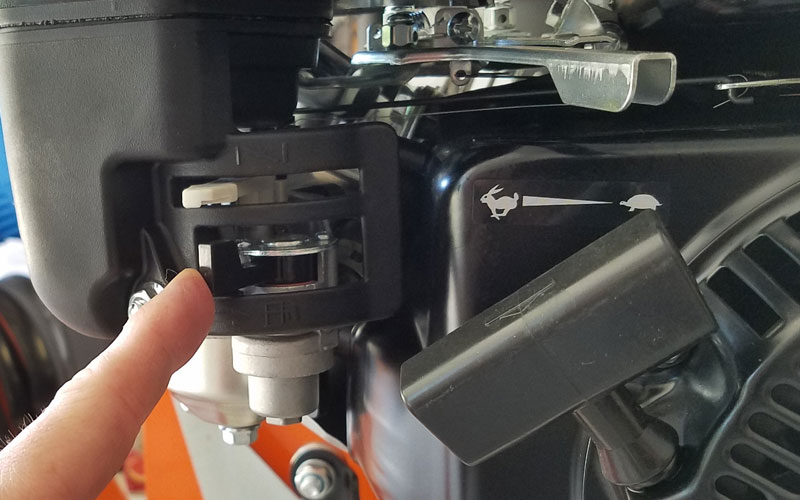
Let the motor run for a couple of minutes before engaging the impeller blade. Once the engine throttles at a smooth rate, engage the impeller blades by sliding the impeller blade lever up toward the engine compartment.

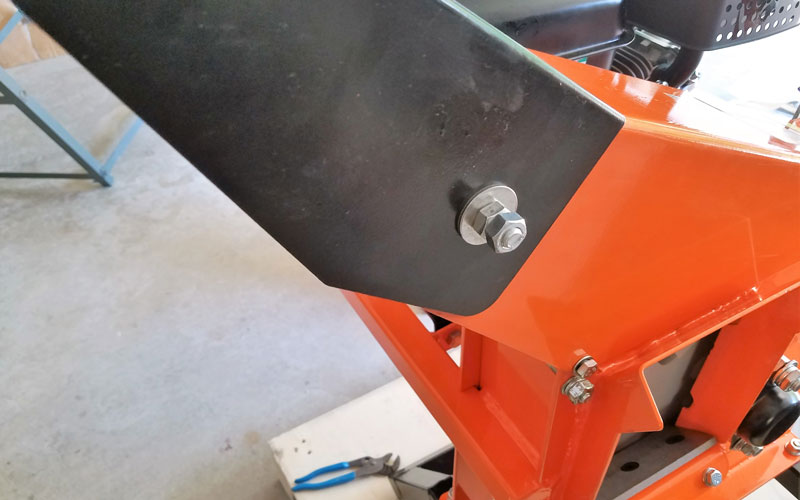
LEFT - Impeller blade shown in the engaged position, towards the engine compartment. RIGHT - Shown with the impeller blade disengaged (away from the engine compartment)
To stop the unit, first disengage the impeller blade by sliding the lever away from the engine in the closed position. Let the blade come to a complete stop before moving or servicing the unit.
Next, turn the power switch into the OFF position.
Once the engine stops, slide the fuel line toggle into the closed position.
Shown with fuel line in OFF (closed) position
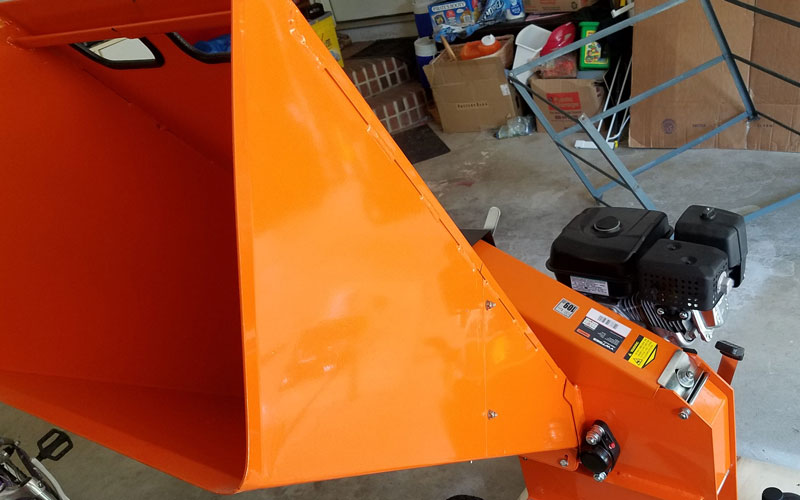
Here’s one final thing you should know before operating the Yardmax chipper/shedder. The end of the deflector chute adjusts up or down. It has a twist lock on the chute to direct where you want to shoot the debris. As the machine vibrates, the chute loosens and lowers over time. So check from time to time to make sure the angle still works for you.
The unit does not come equipped with a collection bag.
CHIPPING & SHREDDING Performance
The Yardmax claims to chip branches up to a diameter of 3 inches and to shred branches, leaves, pine cones, etc. The instructions state clearly to avoid fibrous plants like flax, pine needles or cabbage that can wrap around the rotor shaft and bearing.
I like the theory of having one big hopper for everything instead of one for chipping and one for shredding. Having seen the size and thickness of the blades while assembling the unit, I imagined this sort of machine could shred a lot more than branches (for additional information, watch the movie Fargo).
The cutting action of the Yardmax comes from two thick, heavy impeller blades
But I wondered how it would work in practice.
Easy to Move
I wheeled the unit to where I planned to use it for the day. At 226 lbs, the unit is far from lightweight. But the oversized wheels helped me move it the distance (with only a few rest breaks).
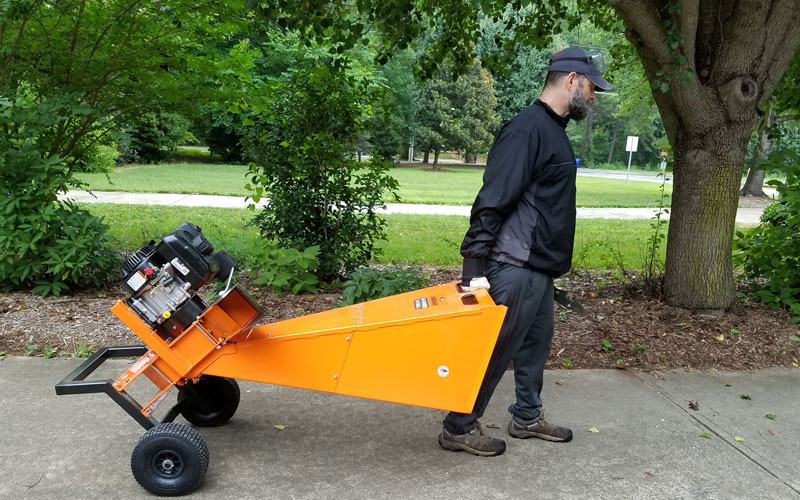
The big wheels made transport of even such a heavy machine manageable
Starting the Engine
When I started the engine for the first time, I pulled the start cord slowly until it fought back a bit, and then I put some muscle into it. The engine started on the first pull.
I let the engine warm up for a few minutes before s-s-l-l-o-w-l-y engaging the impeller blade. The round disk that holds the blades is heavy, and as it starts to spin, the engine sounds like it wants to cut out. Once the engine labors, back off a bit on the impeller lever. Be patient. As it spins faster, you can continue to lift the level towards the engine. Within 30 seconds, I had the impeller blade engaged and spinning fully.
Chipping Performance
For the chipping part of the test, I piled up branches ranging from extremely soft to hard. Some of my branches were as long as 10’ in length and, since they were very straight, I wanted to see how the Yardmax would live up to its “self-feeding” claim.
Some of my branches were more crooked and contained more spurs than others. I suggest you plan ahead to bring a good bow saw (like the FATMAX 24” Bow Saw) or a strong pruner or lopper, like the Corona ComfortGEL+ Extendable Bypass Lopper, to the job site so you have it on hand to cut stubborn branches into shape.
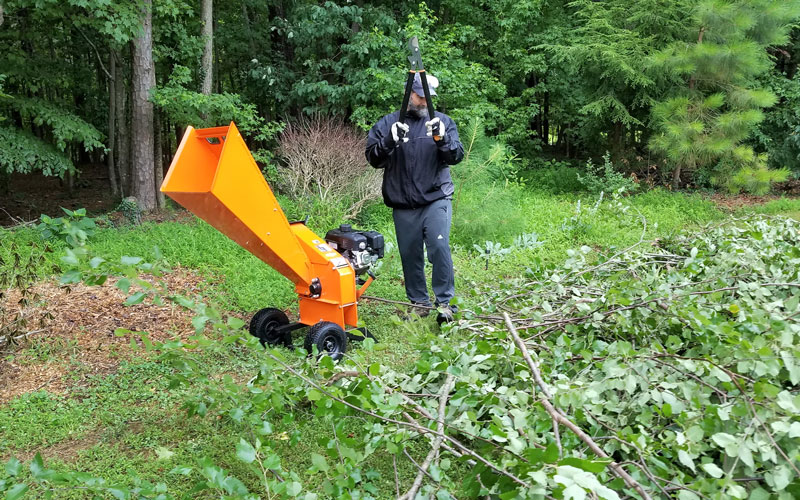
Plan to bring a bow saw and some good pruners or loppers to the job site to help trim branches into manageable sizes and shapes
I fed the hopper a few inch-thick branches (thickest end first) covered in leaves to see how it worked. Turns out, the Yardmax really does have a self-feeding feature, and it worked well. As soon as the blade touched the branch, the wood fed itself down the hopper and chips spit out the deflector chute.
I started feeding it more and thicker branches. The unit never hesitated.
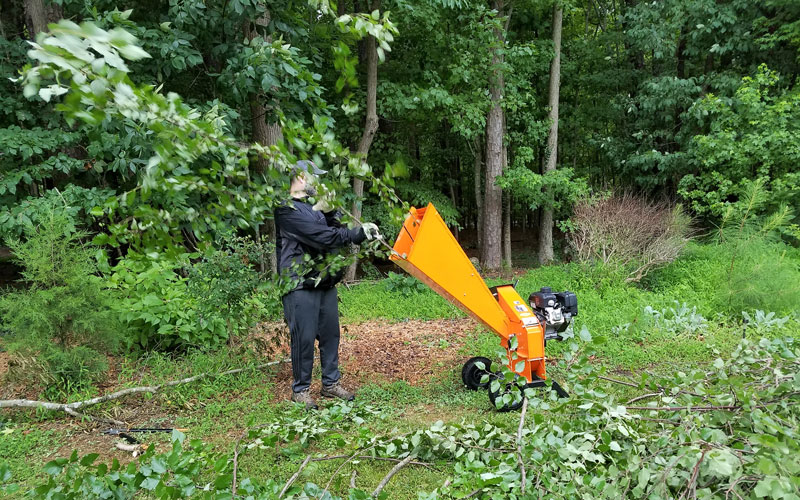
The Yardmax ate a steady diet of wood without a problem
I started loading the hopper with a steady diet of fresh, soft wood (Eastern Redbud and Birch). I noticed after about 10 minutes that the discharge chute had stopped discharging. I looked into the end of the chute. The door stood open about an inch, and I could see debris stuck in the chute.
I fought the urge to stick my hand in the end of the chute to see if I could clear the debris. Instead, I followed the instructions. I disengaged the impeller blade (pulled the lever down and away from the engine compartment) and switched the unit to the off position. Once the blade stopped spinning, I pulled out all of the debris I could reach from the discharge chute. Then I started the unit again. It started right up.
The unit should be able to clear itself if the rotor and bearing isn’t clogged to the point of not being able to spin. For now, the problem was solved, and I continued to work.
With more practice, I fed it longer and thicker branches. It was my version of a test-to-break review. What would it take to stop the engine?
The Yardmax chipper shredder excels in chewing through long, relatively straight branches
As a wood chipper, the YARDMAX is a beast.
Shredding Performance
Remember that this unit has one hopper that serves as both a chipper and shredder. Once I tested the chipping function for a couple of hours, I switched to feeding the unit a diet of softer and smaller branches.
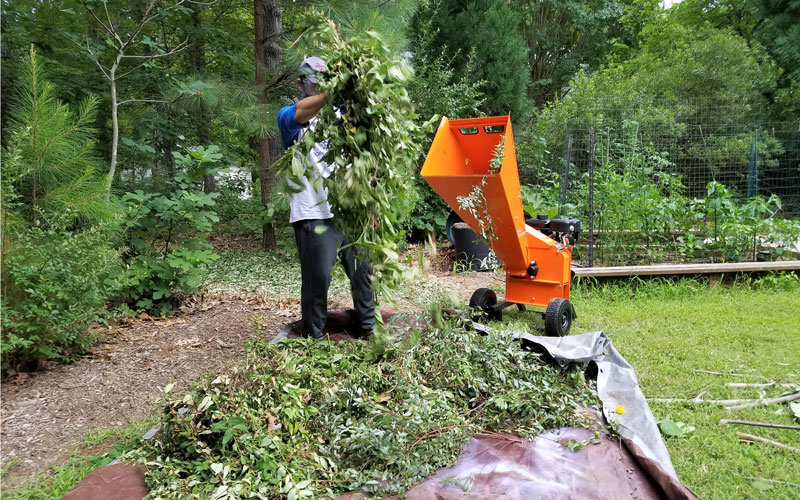
After trimming the hedges around my walkway, I fed the remains into the Yardmax hopper
The operator’s manual warns against “feeding pine needles, flax, and cabbage tree leaves” into the hopper since they can “wrap around the rotor shaft and work their way into the bearing.” I wouldn’t know flax and cabbage tree leaves from seaweed and kelp. But whatever the stringy materials were that I fed into the Yardmax, they quickly choked the engine.
I switched the unit to the OFF position and disengaged the impeller blade. Then I loosed the clamp that secures the discharge chute to the frame and swung it open to look inside the blade.
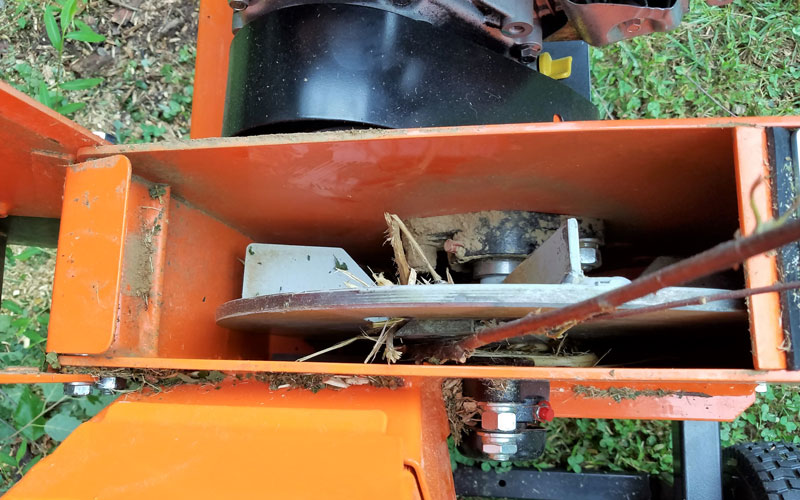
The steady, stringy diet stopped the engine cold
Using a pair of long pliers (and while wearing leather gloves), I carefully pulled out all of the debris jammed in the rotor. It took about 10 minutes to clear it out so the cutting disk could rotate freely.
After reattaching the discharge chute clamp, I restarted the engine without a problem. I fed the unit more stringy branches, and within 10 minutes, I needed to clear another jam.
After cleaning out the rotor again, I tried something different. I filled the hopper with leaves and stringy material and followed it up with a leafless, hardwood branch chaser. The density of the wood helped push and clear out the lighter weight debris. Whereas a steady diet of soft, leafy, and stringy materials jammed the rotor, I experienced no more jams by switching between hard and soft.
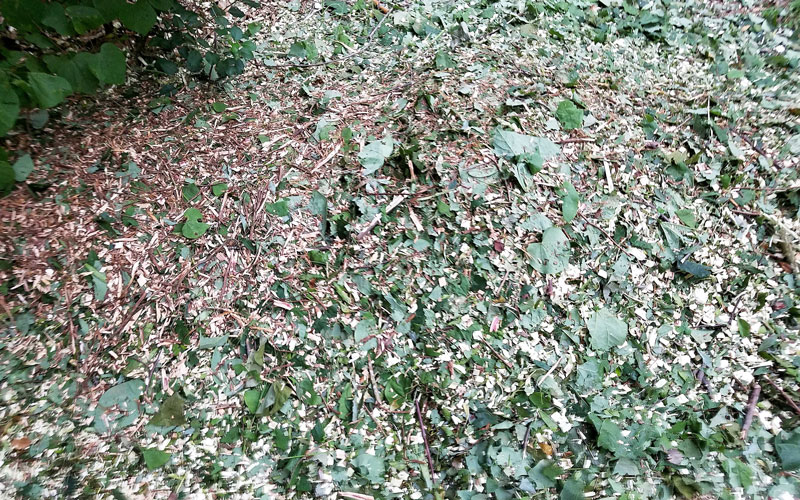
Shown a combination of leaves, stringy branches, and hardwood
Shredding soft material was less successful than chipping branches.
PROS AND CONS OF THE YARDMAX CHIPPER SHREDDER
If you’re like me, you will like this about the Yardmax chipper/shredder:
- Great chipper. As a chipper, the Yardmax is superior. It chews through all kinds of wood with ease. I had neighbors dragging over branches from their yard to see firsthand what it could do. It didn’t disappoint.
- The single, long hopper. While the size of the hopper made it challenging to install by myself, I loved the convenience of not having to presort branches by size. The long funnel-shaped hopper allowed me to feed in branches with more curves and forks than other units. And while you should never stick your hand or arm into the hopper, the extra-long size offers peace of mind should you forget and let your arm reach too far. All but the fingers of a professional basketball player should be far out of reach from the spinning cutting disk.
- Powerful. While the 208cc motor might seem undersized for a tool meant to chew through 3” branches, the heavy cutting disk and thick, sharp blades make the most of the relatively small engine.
- Self-feeding. The instructions warn against forcing branches into the blade. The self-feeding feature does the work for you. Once the branch reaches the blade, the cutting disk takes over and keeps pulling the branch inside until it’s reduced to chips.
- Transportable. The Yardmax is heavy. Fortunately, the balance of the unit puts the weight over the large wheels, making rolling it to your worksite manageable.
- 90-Day commercial warranty. I’ve not seen other chipper/shredders in this size category that offer a commercial warranty. I tested this unit for 6 hours at a time. I imagine a landscaping crew might have this unit running 4 or 5 hours each day. Yardmax must believe in their quality and workmanship if they would offer any sort of commercial warranty.
- Price. The Yardmax is competitively priced under $800, and it performs as well (and in some ways better) than units costing $200-300 more.
Here are a couple of things that I think could be improved—
- Offer a collection bag option. Depending on your situation, you might not have a place where you can direct wood debris where it won’t be unsightly. Also, you might want to collect the mulch for use in your yard. A collection bag would help address those two issues.
- Better shredding. While the shredder worked well enough (particularly when fed a combination of soft material and harder branches), I’d like to see the shredder on par with the excellent performance of the chipper. I’m not sure how to accomplish that from an engineering standpoint. My Vitamix can make hot soup, smoothies, ice cream, and salsa. I don’t know how it does all of that, but it does. While the thick blades on the cutting disk do serious damage to branches, it’s possible that the disk needs a different blade or a higher speed to shred soft materials more effectively.
WARRANTY
The Yardmax comes with a 2-year residential and a 90-day commercial warranty against defects in materials and workmanship.
RECOMMENDATION
For the price, I love the Yardmax. It’s a better chipper than any unit I’ve used, and it’s almost as good as others when it comes to shredding. The self-feeding feature makes it much easier to feed material into the large hopper, and the combination of a powerful engine and heavy cutting blades makes quick work of branches up to 3 inches in diameter. It’s a well-built, heavy-duty unit that should stand up well to use over the long term. And while it’s heavy, it’s also well-balanced and easy enough to move around on the large, all-terrain tires.
Below is a video from Yardmax, showing the chipper/shedder in action.
WHERE TO BUY
You can buy the Yardmax Chipper Shredder (YW7565) on Amazon where it currently sells for under $800.

Last update on 2024-04-18 / Affiliate links / Images from Amazon Product Advertising API
Enjoyed This Review?
If you liked this review, please sign up for our email updates with reviews, how-to articles and gardening videos!
: Product Review")
: Product Review")

Great Review Thanks! Well written and complete. It would be great to see a Video too.
Rural King stores also sell these for $599, and you can order through Home Depot for $678
Excellent review. My experience with this machine has been similar to yours. However, the issue that I have had on several occasions is green (under 6 months) twigs will wrap themselves around the flywheel shaft and stall the motor. I’m talking about twigs 1/4″ to 1/2″ in diameter green stuff. And to “unwrap” them from the shaft requires me to remove the intake chute and open the flywheel cover, get a good pair of pliers, and turn the flywheel both directions, grabbing twigs and pulling them in different directions while slowly turning the flywheel in different directions. The only way to avoid this is to not introduce any 1/4″ to 1/2″ green material into the machine, which means I have to cut those branches from everything I’m chipping and make a different pile. I can use my 90s era Bolens (Garden Way) 8hp Tecumseh powered shredder to chew them up, which it does a good job of. The extra amount of time this process will require doesn’t make me a Yardmax fan, and I’m already researching PTO chippers for my 40hp Mahindra tractor (if I can convince the wife of the expenditure).
How would this work with rose prunings? The self feeding feature seems like it would prevent having to push branches in and get stuck with thorns. But does it get stuck on smaller branches of rose prunings? I have several hundred roses with a lot of prunings to get rid of, and the wide hopper seems great for this.