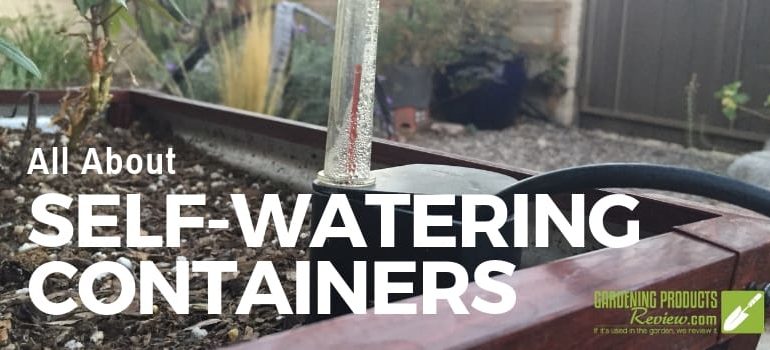
All About Self-Watering Planters & Containers
We independently evaluate all recommended products and services. If you click on links we provide, we may receive compensation.
Self-watering containers are a must-have if you’re forgetful, live in a hot or dry climate, or you’re just not home very often. They’re also helpful if your containers are in an area that’s not convenient to a water spigot, such as a balcony, if you’re growing plants that don’t like to dry out, or if the plants don’t like getting their leaves wet.
In the video below, I walk you through:
- the features of self-watering containers,
- how they work,
- different types (including DIY options), and
- how to plant and grow things in them.
Or just keep reading for all the details, including my top recommendations.
What is a self-watering container or planter?
Contrary to what the name implies, a “self-watering planter” doesn’t actually water itself. But it does provide a consistent source of moisture to the plants growing in it and allows you to water less frequently.
Although designs may differ somewhat across brands and planter styles, the basics are the same. Water is poured directly into a water reservoir and then “wicked” into the planting container above the reservoir.
Parts and Common Features
Not all self-watering planters will have all of the items listed below, but they typically include a:
- water reservoir
- planting container
- wicking mechanism
- fill tube
- overflow hole or spout
- water level indicator
- drainage hole and plug
The top section of a self-watering planter is usually for your potting mix and plants, while the bottom contains the water reservoir. Reservoirs vary in size, often in proportion to the overall size of the container. In larger containers, it’s not unusual to have a 5-gallon reservoir, while smaller planters may have only a 1-gallon capacity (or even less). Look for a planter with a water reservoir that’s large enough to provide adequate moisture for the volume of potting mix in the container above and that you won’t have to fill every day.
A fill tube or opening of some kind is used to pour water directly into the reservoir. This can vary from a simple tube placed in the corner of the planter to a hole in the planter rim or an opening in the container wall that gives direct access to the reservoir. Some tubes have caps to keep pests and debris out of the reservoir. (I like that option but unless the cap is attached to the container, I always end up losing it!)
Some planters have an indicator that shows how much water is in the reservoir. These are convenient, as you’ll have a better idea of when the reservoir needs to be refilled.
All planters should have an overflow mechanism that allows water to drain out if the reservoir is filled to full. This prevents plants from sitting in water (which would rot them pretty quickly) if you overfill the reservoir by mistake and keeps water at the right level after a heavy rain.
Finally, a drainage hole with a plug allows you to drain the container at the end of the season (don’t leave water in the reservoir during the winter if there’s any chance it could freeze) or bring it indoors.
How do self-watering planters work?
There are two basic ways in which self-watering planters move water from the reservoir into the planting container above, both of which rely on capillary action. If you’ve ever dipped one end of a paper towel in water, you’ll have seen capillary action in action as water slowly creeps across the rest of the paper towel. In self-watering systems, you’ll the following designs:
- A “wick” is placed inside the container, with one end in the water reservoir and the other end in the potting mix. This can be a strip of capillary mat, an absorbent tube-shaped plug or a thick string. The wick basically sucks water out of the reservoir and delivers it to the potting mix.
- The planting container is designed with a section that sits inside the water reservoir, placing potting mix directly in contact with the water. Water from the wet mix in that section is pulled up into the rest of the planting container through capillary action. This is the most common design.
A third design sometimes sold as being “self-watering” has a perforated separator between the reservoir and planting container (so potting mix is never in direct contact with the water below). It relies on evaporation from the reservoir to moisten soil at the bottom of the planter and, from there, spread it throughout the container. In my experience, this is the least effective of the self-watering container designs.
How are they helpful?
Consistent Moisture and Less Frequent Watering
I like self-watering containers because they provide consistent moisture for your plants without having to constantly water by hand. At our headquarters here in Tucson, my planters that don’t have a self-watering system need to be watered twice a day during the summer to keep them from drying out. On the other hand, my self-watering planters generally go a week between waterings (and the TruDrop planters can go two to three weeks, even in 100F+ temperatures!).
The consistency is especially helpful for plants that don’t react well to inconsistent watering, such as tomatoes; you’ll probably find that you have a better yield if you use self-watering planters for your vegetables. I’ve had fantastic results growing veggies in the Vegepod (a self-watering planter that won our Golden Shovel Award in 2018) and now use it for all my lettuce, beans, squash and tomatoes.
Note: Some plants, such as cactus and succulents, do not grow well in constantly moist conditions. Don’t plant them in a self-watering container.
More Efficient Use of Water
Because water is in an enclosed reservoir, it doesn’t evaporate directly into the air; instead, it goes directly to the plant’s roots. In contrast, when you spray your plants (or even when you use a watering can), a lot of that water goes on the ground or the plant’s leaves, where it evaporates without benefiting the plant.
Prevents Plant Diseases
Some plants, like tomatoes and phlox, are prone to fungal diseases if the leaves get wet. By watering from below, a self-watering container bypasses this issue, resulting in healthier plants.
How to set up a self-watering container
At this point, if you haven’t watched the video (above), this would be a good time to check it out, so that you can see a demonstration of how a self-watering planter works and how to plant it.
But, generally, you’ll want to follow these steps:
- Insert the parts into the container (according to instructions for your specific self-watering system).
- Add any type of moist potting mix to the planting container. Some companies sell mixes specific for self-watering containers but any high-quality mix will work. The key is to moisten it before placing it in the planting container. If you use dry potting mix, it will not work.
- Pack the moistened mix into the depressions at the bottom of the planting container (that’s where the moisture gets wicked up into the soil/roots) OR if your system has a wick, be sure one end (or both ends – read the instructions for your planter) is placed in the water reservoir.
- Plant your favorite plants in the container. Don’t compact the potting mix but do firm in the plants so they’re well-supported.
- Water from the top to remove air pockets and settle the roots (add additional potting mix if needed). This is typically the only time you’ll water from above; after this, just fill the reservoir directly.
- Wait a while for water to percolate down through the potting mix into the reservoir. Then fill the reservoir completely.
- Refill the reservoir as necessary when the water level is low. Do NOT let it dry out. If it does, water from above to ensure that all of the potting mix is thoroughly moistened before filling the reservoir again. Dry planting mix will not wick water so even if you fill the reservoir, the plants won’t receive the moisture they need.
At the end of the season …
Remove the potting mix from the planter each year (you can use it again if desired) and clean out the reservoir. Roots tend to grow down into the reservoir and can completely fill it or clog the wicking wells. This is especially true for plants like sweet potato vine; they grow exceptionally well in a self-watering planter but the roots are aggressive in their search for water, sending huge masses of roots into the reservoir and quickly sucking it dry.
In areas with cold winters, drain the planter before storing it for the winter. Any water that freezes inside the reservoir can crack the walls.
Which types of containers are available/recommended?
Self-watering containers vary by brand, style, size, features, appearance and more, just like most planting containers. I’ve used many different types over the years – below are my favorites.
Most Attractive
If you’re looking for something more decorative, the one in the video is by Lechuza, and I highly recommend it. After 7 years, it still looks like new and works flawlessly.
Best for Growing Vegetables
For veggies, I go with something more utilitarian, rather than decorative, and large enough to grow a decent crop. My favorites are below (some are also shown in the video).
No products found.
Larger Self-Watering Planters
Self-watering planters come in a wide range of shapes and sizes. Two I particularly like are:
No products found.
Outstanding Capacity
One self-watering container that’s not shown in the video but is truly outstanding, is the TruDrop planters from Crescent Garden. The large Rim planter can go 3 weeks between refills even in the extreme summer heat.
Self-Watering Inserts
You can make your own self-watering container if you’re more DIY-inclined; a simple internet search will reveal several different options. But I prefer to do it the easy way – I buy self-watering pot reservoirs from Gardener’s Supply.
No products found.
I’ve reviewed many self-watering containers so if the list above doesn’t meet your needs, check out all the reviews.
See our reviews of self-watering containers >>
And that’s it! Let us know if you try out a self-watering container for the first time, we’d love to hear how it works for you!
Last update on 2024-04-18 / Affiliate links / Images from Amazon Product Advertising API

